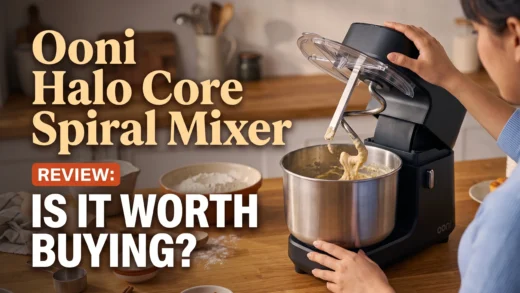
The bowl hitting the beater or scrapes the bottom of the bowl during mixing is one of the most common and most fixable stand mixer issues. It’s almost always a clearance adjustment problem rather than a sign of damage, and most models have a simple built-in way to fix it.
Quick Answer: If you hear a scraping or clicking sound as the beater passes near the bottom of the bowl, your beater height is likely set too low. Most stand mixers have an adjustment screw specifically for this, and the fix usually takes just a few minutes.
If the beater repeatedly touches the bowl and creates a clicking sound, see our guide on why a mixer makes clicking sounds.
⚖️ What Type Of Bowl-Beater Contact Are You Having?
The type of contact usually reveals whether the issue is a simple clearance adjustment or a deeper mechanical problem.
Usually indicates the beater clearance is slightly too low.
The beater may be positioned too close to the bowl base.
Possible bowl positioning, attachment, or alignment issue.
Stop using and inspect for bent parts or damage.
Symptoms
🔎 Find Your Bowl-Beater Contact Problem
Match the contact problem you notice with the most likely cause and the first thing to check.
| What You Notice | Most Likely Cause | First Check |
|---|---|---|
| 🔊 Beater lightly scrapes the bottom of the bowl | Beater height is too low | Adjust beater-to-bowl clearance |
| ↔️ Beater hits the side of the bowl | Bowl not seated correctly or alignment issue | Check bowl position and locking mechanism |
| 🥣 Beater does not reach ingredients at the bottom | Beater height is too high | Lower the beater slightly using the adjustment screw |
| ⚙️ Contact happens after changing attachments | Wrong attachment, bowl, or accessory combination | Confirm the correct attachment for your model |
| 🔄 Beater hits only at certain points during rotation | Bent beater, uneven bowl, or alignment problem | Inspect attachment and bowl condition |
| ⚠️ Beater hits hard and creates loud knocking | Clearance issue or damaged component | Stop using and inspect before further mixing |
Mechanical alignment issues can also affect how smoothly the mixer operates and may contribute to mixer losing speed.
In this article, we’ll cover:
🧰 Tools & Items You May Need
Most bowl and beater contact problems can be solved through simple checks and adjustments before replacing any parts.
Use a coin or similar object to check beater-to-bowl clearance.
A small screwdriver or wrench may be needed for height adjustment.
Inspect bowl edges, attachment condition, and contact points.
Confirm the correct attachment and adjustment method.
A replacement attachment, bowl inspection, or mechanical adjustment may be needed if the beater or bowl is damaged.
Turn off and unplug the mixer before adjusting attachments or inspecting the bowl and beater.
Stop and Check Immediately If…
- The beater is visibly bent or the bowl shows a dent or deformation
- The contact sound is a hard, metallic clank rather than a light scrape
- The white protective coating on the beater is visibly chipping off
Continuing to run the mixer with a hard metal-on-metal contact can chip the beater’s coating (a cosmetic and food-contact concern, not just noise) and, over time, wear the bowl or beater unevenly. It’s worth pausing to adjust before continuing a mixing task.
🎯 Where Is The Bowl-Beater Contact Coming From?
The beater should rotate close to the bowl without touching it. Contact usually comes from clearance, positioning, attachment, or alignment problems.
Beater height is too low and needs adjustment.
The bowl may not be properly seated or locked.
Wrong, bent, or damaged attachment can cause contact.
Worn or loose parts may affect beater position.
If the beater lightly scrapes the bowl, check clearance first. If contact is uneven or severe, inspect the bowl and attachment alignment.
Causes Ordered by Likelihood and Effort to Check
1. Beater Height Set Too Low
Easy
5–10 minutes
Adjustment tool
The single most common cause. Most stand mixers have an adjustable clearance between the beater and the bowl, set at the factory but adjustable if it shifts over time or after shipping.
- This is fixable in a few minutes using the adjustment method below.
- It’s especially common on mixers that are new, recently shipped, or recently moved to a new adjustment point after a repair.
2. Bowl Not Fully Locked or Seated
Easy
5 minutes
None
A bowl that isn’t completely locked into position can sit slightly lower or at an angle relative to where it’s designed to be, changing the effective clearance even if the beater height itself is correctly set.
- Confirm the bowl is locked according to your model’s mechanism (twist-lock, lever-lock, or lift mechanism).
- Remove and reseat the bowl fully, checking that it locks with a clear, definitive click or resistance point.
If your mixer bowl in hitting the beater unexpectedly during operation, the cause may be different. See our guide on mixer bowl stay locked for a separate troubleshooting path.
3. Wrong Bowl-Beater Pairing for Your Model
Easy
10 minutes
None
Using a beater or bowl not designed for your specific model — including bowls or beaters from a similar-looking model in the same brand’s lineup — can result in a mismatch that no amount of clearance adjustment can fully correct.
- Confirm the beater and bowl you’re using are both listed as compatible with your specific model number, not just the general product line.
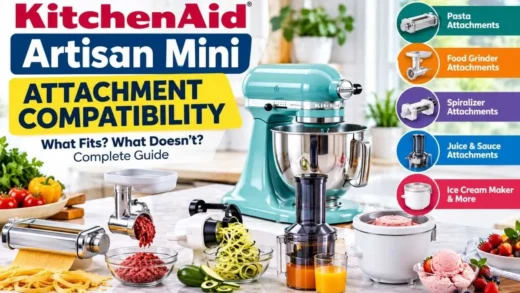
- See KitchenAid Bowl Compatibility Guide and KitchenAid Attachment Compatibility Guide for model-specific pairings.
Always turn off and unplug your mixer before adjusting the beater height, removing attachments, or inspecting the bowl. Never continue using the mixer if the beater is striking the bowl forcefully.
4. Bent Beater or Bowl Deformation
Moderate
30 minutes
Adjustment tools
A beater that’s been dropped, force-fit, or used with something hard in the bowl can develop a slight bend that brings it closer to the bowl at one point in its rotation, even with correct height adjustment.
- Inspect the beater shaft and paddle for visible bending, particularly if the contact is intermittent (only some rotations) rather than constant.
- Check the bowl itself for dents or deformation, especially near the base, if it’s been dropped.
A bent beater should be replaced rather than adjusted around, since forcing clearance to compensate for a bend can create uneven mixing and further stress on the attachment hub.
Always turn off and unplug your mixer before adjusting the beater height, removing attachments, or inspecting the bowl. Never continue using the mixer if the beater is striking the bowl forcefully.
5. Worn Bowl-Lift Mechanism (Bowl-Lift Models)
Moderate
30–60 minutes
Replacement part
On bowl-lift mixers, the mechanism that raises the bowl into mixing position can wear over time, causing the bowl to stop slightly lower than its intended height even when it feels fully raised and locked.
Signs this is the cause:
- Contact has developed gradually on a mixer that didn’t have this issue when new
- The bowl-lift lever feels different (looser or requiring more effort) than it used to
- Adjustment via the standard clearance screw doesn’t fully resolve the issue
This typically requires professional inspection.
Always turn off and unplug your mixer before adjusting the beater height, removing attachments, or inspecting the bowl. Never continue using the mixer if the beater is striking the bowl forcefully.
How To Adjust Beater Clearance (The “Dime Test”)
This is the standard method most manufacturers recommend for checking and adjusting beater height, and it works on most tilt-head and bowl-lift stand mixers with a clearance adjustment screw.
- Unplug the mixer before doing anything else.
- Attach the flat beater and lower the head (tilt-head models) or raise the bowl (bowl-lift models) into the normal mixing position.
- Place a dime flat on the bottom of the bowl, roughly beneath where the beater passes.
- Slowly rotate the beater by hand (with the mixer unplugged) and observe whether it brushes the dime.
- If the beater doesn’t touch the dime at all, or presses down on it hard, locate the adjustment screw (commonly on the underside of the mixer head near where it connects to the body).
- Turn the screw in small increments, testing after each adjustment, until the beater just barely brushes the dime without pressing hard against it.
Note: the dime test is designed for stainless steel bowls. Glass and ceramic bowls can have slightly different clearance due to manufacturing variation, and may need adjustment by mixing feel rather than the dime method alone.
Repair vs. Replace
⚙️ Should You Adjust, Repair, or Replace Your Mixer?
A beater touching the bowl does not usually mean your mixer needs replacement. Most cases can be corrected by adjusting clearance or fixing setup issues.
Probably Needs Adjustment
- Beater lightly scrapes the bowl
- Problem started after changing attachments
- Bowl was recently removed or repositioned
- No bending, cracking, or unusual noise
Needs Repair Inspection
- Beater hits hard even after adjustment
- Attachment appears bent
- Bowl is damaged or distorted
- Contact returns repeatedly after fixing
🔊 Light scraping → Adjust beater clearance
🥣 Uneven contact → Check bowl and attachment
↔️ Contact at one point → Inspect alignment
⚠️ Hard impact → Stop and inspect parts
Preventing Bowl-Beater Contact
🛡️ How To Prevent Bowl-Beater Contact
Regular checks and correct setup can help maintain the proper gap between the beater and the bowl.
Check Clearance
Test the beater height occasionally to make sure it is not too close to the bowl.
Seat The Bowl Correctly
Always lock the bowl properly before starting the mixer.
Use Correct Attachments
Use only attachments designed for your specific mixer model.
Inspect Attachments
Check beaters for bending, cracks, or unusual wear.
Adjust Early
Fix light scraping before it becomes severe contact.
Follow Manufacturer Settings
Use recommended bowl sizes, attachments, and adjustment methods.
A small scraping sound is easier to correct than repeated metal-to-metal contact. Check clearance as soon as you notice a change.
Pro Tips
- Do the dime test even without symptoms. Checking clearance periodically, even before you notice a problem, catches drift before it becomes an audible issue or damages the beater’s coating.
- Test with the exact beater you use most. If you own multiple attachments, clearance can vary slightly between them — check the one you use most often for daily baking.
- Small adjustments only. The clearance screw typically needs only small turns to make a meaningful difference — over-adjusting in one direction is a common mistake that creates the opposite problem (beater too high to mix effectively).
- Recheck after any drop or impact. If the mixer’s been bumped, dropped, or jostled during a move, a quick clearance check is worth doing before your next use, even if nothing looks obviously wrong.
Frequently Asked Questions
Why is my mixer beater hitting the bowl?
A mixer beater may hit the bowl because the beater height is incorrect, the bowl is not seated properly, the attachment is wrong or damaged, or there is an alignment issue.
How do I stop my mixer beater from scraping the bowl?
Most scraping problems can be fixed by adjusting the beater-to-bowl clearance, checking the bowl position, and ensuring the correct attachment is installed.
Is it normal for a mixer beater to touch the bowl?
The beater should not continuously touch the bowl during normal operation. Light contact indicates that the clearance may need adjustment.
Why does my mixer make a clicking sound when the beater hits the bowl?
A clicking sound may happen when the attachment repeatedly contacts the bowl during rotation. The beater clearance and attachment alignment should be checked.
Can a bowl or beater be damaged if they keep hitting each other?
Yes. Repeated contact can wear the attachment, damage the bowl surface, and create more serious alignment problems over time.
Final Thoughts about Bowl Hitting The Beater
Beater-to-bowl contact is one of the most straightforward stand mixer issues to diagnose and fix, thanks to a simple, manufacturer-endorsed adjustment process.
Start with the dime test before assuming anything is damaged; in the large majority of cases, a small turn of the clearance screw resolves it completely.
Reserve concern for bent parts, mismatched bowl-beater pairings, or a bowl-lift mechanism that doesn’t hold its position even after adjustment.
Related Reading:
- Why Is My Mixer Making Grinding Noise?
- Why Is My Mixer Shaking?
- Why Won’t My Mixer Bowl Stay Locked?
- The Complete Stand Mixer Troubleshooting Guide: 14 Fixes For Any Brand
- KitchenAid Bowl Compatibility Guide
- KitchenAid Attachment Compatibility Guide
Last Updated on September 5, 2026 by Susan Joy