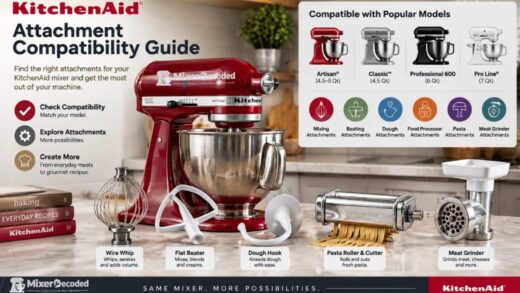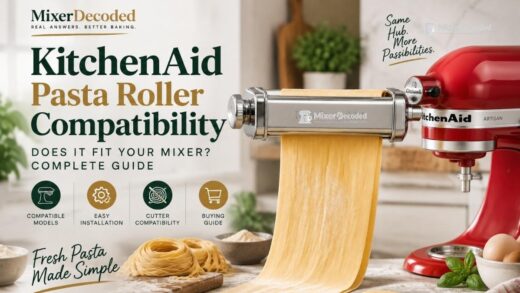
The KitchenAid pasta roller connects to the attachment hub on KitchenAid household stand mixers. The key is understanding the difference between mixer compatibility and the specific pasta attachment you are buying.
The KitchenAid KSMPSA Pasta Roller is a roller-only attachment that turns prepared pasta dough into sheets. Sets such as the KSMPRA include the roller together with pasta cutters, giving you additional options for making shapes such as spaghetti and fettuccine.
Does the KitchenAid KSMPSA Fit Your Mixer?
Yes. KitchenAid states that the KSMPSA pasta roller fits all household KitchenAid stand mixers. It connects through the mixer’s front attachment hub and uses the mixer to power the roller.
The KSMPSA rolls and thins pasta dough into sheets. It does not itself cut those sheets into spaghetti or fettuccine. If you want both rolling and cutting, you need a compatible pasta cutter or a set such as the KSMPRA that includes the roller and cutters.
In this article, we’ll cover:
KitchenAid Pasta Roller Compatibility at a Glance
The KSMPSA is designed to work through the attachment hub on a KitchenAid household stand mixer. The important part is understanding what the roller does, what comes with it, and which additional components you may need for the pasta shapes you want to make.
| Compatibility Detail | KSMPSA |
|---|---|
| Compatible mixer | All household KitchenAid stand mixers |
| Connection | Front attachment hub |
| Power source | Powered by the KitchenAid stand mixer |
| Primary function | Rolls and thins pasta dough into sheets |
| Sheet width | 6 inches |
| Thickness settings | 8 adjustable settings |
| Roller material | Stainless steel |
| Pasta cutters | Not included with the standalone KSMPSA roller |
| Cleaning accessory | Cleaning brush included |
The standalone roller is designed to roll and thin pasta dough into sheets.
A compatible cutter is needed to turn rolled pasta sheets into specific noodle shapes.
Models such as the KSMPRA package the roller with specific pasta cutters, so always verify what is included.
Quick Compatibility Check
| What you have or want | Compatibility information |
|---|---|
| KitchenAid household stand mixer | The KSMPSA is stated by KitchenAid to fit all household KitchenAid stand mixers. |
| KSMPSA Pasta Roller | Compatible with household KitchenAid stand mixers. |
| Pasta roller + spaghetti noodles | You need the roller plus a compatible spaghetti cutter, or a set that includes one. |
| Pasta roller + fettuccine noodles | You need the roller plus a compatible fettuccine cutter, or a set that includes one. |
| Complete roller-and-cutter setup | The KSMPRA includes the roller, spaghetti cutter, fettuccine cutter, and cleaning brush. |
| Mixer bowl | The pasta roller does not attach to the bowl; it uses the stand mixer’s attachment connection. |
What the KSMPSA Actually Does
The KSMPSA is a pasta roller, not a complete pasta-cutting system by itself. Its job is to take prepared pasta dough and roll it into flat sheets. KitchenAid specifies a 6-inch sheet width and eight thickness settings, allowing you to adjust the thickness of the dough before cutting or using it for recipes such as lasagna or ravioli.
The distinction matters when shopping because the roller and cutters perform different jobs. The roller produces the flat sheet; a cutter then turns that sheet into a particular noodle shape. The KSMPSA package includes the pasta roller and cleaning brush, while KitchenAid states that compatible pasta cutters are sold separately.
The Simplest Way to Think About the System
KitchenAid stand mixer → attachment hub → pasta roller → pasta cutter
The stand mixer provides the power. The roller controls the thickness of the pasta sheet. A separate cutter, when used, determines the noodle shape.
This is why two products that both contain the words “KitchenAid pasta attachment” can give you very different setups. One may contain only the roller, while another may include the roller and multiple cutters.
Before buying, always check the model number and the “included” components rather than relying only on the product title or photograph.
KitchenAid KSMPSA Pasta Roller Specifications
The KitchenAid KSMPSA Pasta Roller is the standalone roller attachment used to turn prepared pasta dough into flat pasta sheets. It is powered by a KitchenAid stand mixer and connects through the mixer’s attachment hub. KitchenAid states that the KSMPSA fits all household KitchenAid stand mixers.
The roller is designed for adjusting pasta dough from thicker to thinner sheets rather than cutting the dough into noodle shapes. It has eight thickness settings and produces pasta sheets up to 6 inches wide. The roller itself is made from stainless steel, and the KSMPSA package includes a cleaning brush. KitchenAid also states that the roller works with its pasta cutters, which are sold separately.
KSMPSA Specifications at a Glance
| Specification | KSMPSA |
|---|---|
| Product type | Pasta roller attachment |
| Model number | KSMPSA |
| Power source | KitchenAid stand mixer |
| Mixer compatibility | All household KitchenAid stand mixers |
| Connection | Stand mixer attachment hub |
| Pasta sheet width | Up to 6 inches |
| Thickness settings | 8 |
| Roller material | Stainless steel |
| Primary function | Rolls pasta dough into flat sheets |
| Cleaning accessory | Cleaning brush included |
| Pasta cutters | Sold separately |
| Pasta sheet cutting | Requires a compatible cutter when a noodle shape is desired |
What the Eight Thickness Settings Mean
The eight settings allow the pasta sheet to be progressively rolled thinner. The number on the roller does not represent the width of the pasta or the number of noodles it will produce. Instead, it identifies the roller’s thickness position.
This distinction is important when using the attachment because the roller setting controls the thickness of the sheet, while a separate cutter determines the shape and width of the finished noodles.
For example, you can roll dough into a sheet for lasagna or ravioli without using a cutter at all. If you want spaghetti or fettuccine, the sheet can then be passed through the appropriate cutter.
What Comes With the KSMPSA?
The KSMPSA is the roller-only option. KitchenAid identifies the pasta roller and cleaning brush as the components included with the product. Compatible pasta cutters are separate purchases.
This is one of the most important details to check before buying because the name “pasta attachment” can refer to either an individual roller or a complete roller-and-cutter set.
For comparison, KitchenAid’s KSMPRA 3-Piece Pasta Roller & Cutter Set includes the pasta roller, a spaghetti cutter, a fettuccine cutter, and a cleaning brush.
KSMPSA vs. a Complete Pasta Set
The easiest way to understand the difference is by looking at the job each component performs:
| Component | What it does |
|---|---|
| Pasta roller | Turns pasta dough into a flat sheet |
| Spaghetti cutter | Cuts the sheet into spaghetti |
| Fettuccine cutter | Cuts the sheet into fettuccine |
| Cleaning brush | Removes dry flour and dough residue from the attachment |
So if you already own the KSMPSA and only want to make flat pasta sheets, you do not need to purchase another roller. If you want spaghetti or fettuccine, the next question is which compatible cutter or cutter set you need.
KitchenAid’s own documentation also identifies different attachment combinations by model, including KSMPSA as the pasta roller-only model and KSMPRA as the roller plus spaghetti and fettuccine cutters.
The key takeaway: the KSMPSA determines how your dough is rolled; it does not determine every pasta shape you can make. The final pasta shape depends on whether you use an additional compatible cutter.
How the KitchenAid Pasta Roller Connects to Your Mixer
The KitchenAid pasta roller does not connect to the mixing bowl or to the beater shaft inside the bowl. It connects to the attachment hub on the front of the stand mixer. This is the same powered connection used by many other KitchenAid stand mixer attachments.
Understanding this connection makes compatibility much easier to understand. The mixer supplies the mechanical power through the attachment hub, while the pasta roller uses that power to rotate its rollers and pull the pasta dough through. KitchenAid’s instructions identify the attachment hub as the connection point and require the roller’s power shaft to fit into the square socket inside the hub.
Where Does the Pasta Roller Attach?
Look at the front of your KitchenAid stand mixer, above the bowl area. You should find a covered opening commonly referred to as the attachment hub.
Depending on the mixer, the hub cover may be designed differently. KitchenAid instructions describe models with a hinged hub cover that flips upward and models with a removable hub cover that is loosened and removed using the attachment-hub knob.
The basic connection looks like this:
Stand mixer → attachment hub → pasta roller
The roller’s housing slides into the hub. Its power shaft must engage with the square socket, and the locating pin on the attachment housing must sit correctly in the notch around the hub. Once it is properly positioned, the attachment-hub knob is tightened to secure the roller.
How to Attach the Pasta Roller
Before installing the attachment, KitchenAid instructs users to turn the mixer off and unplug it. This should be done before removing the hub cover or installing the roller.
| Step | What to do | What you are checking |
|---|---|---|
| 1 | Turn the mixer off and unplug it | The mixer is completely powered down |
| 2 | Open or remove the attachment-hub cover | The front attachment socket is accessible |
| 3 | Insert the pasta roller into the hub | The power shaft aligns with the square socket |
| 4 | Rotate the attachment slightly if necessary | The shaft and hub socket engage correctly |
| 5 | Check the locating pin | The pin sits in the notch of the hub rim |
| 6 | Tighten the attachment-hub knob | The roller is firmly secured |
KitchenAid specifically notes that you may need to rotate the pasta roller or cutter slightly back and forth while inserting it so that the power shaft engages correctly. The attachment should not need to be forced into position.
What If the Pasta Roller Does Not Seem to Fit?
A roller that initially appears difficult to install does not necessarily mean that the mixer and attachment are incompatible.
First, check whether the attachment is entering the correct hub socket and whether the power shaft is aligned with the square opening. If necessary, gently rotate the attachment back and forth while inserting it. Also check that the locating pin has entered the corresponding notch and that the attachment-hub knob is tightened after the attachment is fully seated. KitchenAid lists proper hub engagement and tightening as part of its troubleshooting process for pasta attachments.
Do not try to solve a poor fit by forcing the attachment into the hub. If the attachment cannot seat correctly, remove it and check the hub and attachment for obstruction, incorrect positioning, or damage.
Does the Mixer Type Change How the Roller Connects?
The basic attachment connection remains the same: the pasta roller uses the front attachment hub. However, the physical design of the hub cover can vary between KitchenAid mixer models.
For example, KitchenAid’s instructions distinguish between mixers with hinged hub covers and those with removable covers. Some bowl-lift models may also use a different hub-cover arrangement depending on the specific model.
This is why looking only at the shape of the mixer is not the most reliable way to identify an attachment. If you need to confirm your exact mixer model before purchasing an attachment, use the model number rather than relying solely on whether your mixer is described as a tilt-head or bowl-lift model.
A Useful Compatibility Rule
The connection point is simple:
The pasta roller needs a compatible KitchenAid stand mixer attachment hub—not a particular mixing bowl.
This also explains why changing the bowl does not change pasta-roller compatibility. The bowl and the attachment hub serve different functions.
If you are unsure which KitchenAid mixer you own, identify the model number first. That gives you a much more reliable starting point when checking attachments, replacement parts, bowls, and other accessories.
Related Guide: How to Find Your KitchenAid Mixer Model Number
Bottom line: the KSMPSA installs into the front attachment hub. Once the power shaft is aligned with the square socket, the locating pin is seated correctly, and the hub knob is tightened, the roller is mechanically connected to the mixer’s drive system.
KitchenAid Pasta Roller vs. Pasta Cutter: What Is the Difference?
One of the easiest mistakes to make when buying a KitchenAid pasta attachment is assuming that the pasta roller and pasta cutter are the same thing. They are not. Each attachment performs a different step in the pasta-making process.
The pasta roller takes prepared pasta dough and gradually rolls it into a flat sheet. The pasta cutter takes that sheet and cuts it into a particular noodle shape. You can therefore use the roller by itself when you need flat pasta sheets, but you need a compatible cutter when you want a specific cut such as spaghetti or fettuccine.
KitchenAid’s documentation separates these components by model. For example, the KSMPSA is listed as a pasta roller, while the KSMPRA includes the pasta roller, spaghetti cutter, and fettuccine cutter.
Roller vs. Cutter at a Glance
| Component | Main job | What comes out |
|---|---|---|
| Pasta roller | Rolls and thins prepared pasta dough | Flat pasta sheet |
| Spaghetti cutter | Cuts a rolled pasta sheet | Spaghetti-style noodles |
| Fettuccine cutter | Cuts a rolled pasta sheet | Fettuccine-style noodles |
| Capellini cutter | Cuts a rolled pasta sheet | Capellini-style noodles |
| Lasagnette cutter | Cuts a rolled pasta sheet | Lasagnette-style noodles |
The important point is that cutters do not replace the roller. In a typical workflow, the dough is rolled first and then passed through the appropriate cutter.
How the Two Stages Work Together
Think of the process as two separate jobs:
Pasta dough → Roller → Flat pasta sheet → Cutter → Finished noodles
The roller controls how thin the pasta sheet becomes. Once the sheet has reached the desired thickness, the appropriate cutter can be used to produce a particular noodle shape.
For example, if you are preparing lasagna sheets, you may only need the roller. If you want spaghetti, you need the roller followed by a spaghetti cutter. If you want fettuccine, you need the roller followed by a fettuccine cutter.
This distinction is particularly important when comparing KitchenAid product listings because the word “pasta” in a product name does not necessarily mean that every pasta attachment is included.
What Is Included With the KSMPSA?
The KSMPSA is the pasta roller model. KitchenAid’s model chart identifies KSMPSA as including the pasta roller, while the manufacturer separately identifies compatible cutters.
So if you purchase KSMPSA expecting to receive a spaghetti cutter and a fettuccine cutter as well, check the product listing carefully before ordering.
The basic setup is:
KSMPSA = Pasta roller
It does not automatically mean:
KSMPSA = Roller + spaghetti cutter + fettuccine cutter
What Is Included With the KSMPRA?
The KSMPRA 3-Piece Pasta Roller & Cutter Set is a different configuration. KitchenAid lists the set as including:
- 1 pasta roller
- 1 spaghetti cutter
- 1 fettuccine cutter
- 1 cleaning brush
KitchenAid also states that the KSMPRA fits all household KitchenAid stand mixers.
That makes the KSMPRA a more complete setup for someone who wants to roll pasta sheets and immediately cut them into two common noodle shapes without purchasing those components separately.
Why the Difference Matters When Buying
The right attachment depends on what you already own and what you want to make.
| If your goal is… | What you need |
|---|---|
| Lasagna sheets | Pasta roller |
| Ravioli sheets | Pasta roller |
| Flat pasta sheets | Pasta roller |
| Spaghetti | Pasta roller + spaghetti cutter |
| Fettuccine | Pasta roller + fettuccine cutter |
| Spaghetti and fettuccine | Pasta roller + both cutters |
| A complete basic roller-and-cutter setup | A set such as KSMPRA |
This also means you should avoid buying a complete set simply because it says “3-Piece” without checking what you already have. If you already own the roller, for example, the useful part of a purchase may be the additional cutter rather than another roller.
KitchenAid Pasta Attachment Models Are Not All the Same
KitchenAid’s published model/attachment chart shows that different pasta attachment models contain different combinations of rollers and cutters. For example, the documentation identifies:
| Model | Included attachment(s) |
|---|---|
| KSMPSA | Pasta roller |
| KSMPRA | Pasta roller + spaghetti cutter + fettuccine cutter |
| KSMPCA | Capellini cutter + lasagnette cutter |
| KSMFETPRA | Pasta roller + fettuccine cutter |
| KSMPDX | Pasta roller + spaghetti cutter + fettuccine cutter + capellini cutter + lasagnette cutter |
These are component configurations, not separate mixer-compatibility categories. KitchenAid’s documentation lists the models to help identify which roller or cutters are included with each product.
That distinction is useful because a shopper may see several KitchenAid pasta attachment model numbers and assume they represent different mixer compatibility. In reality, the model number can also tell you which pasta components you are actually buying.
The Simple Buying Rule
If you only need to roll pasta dough into sheets, look for the pasta roller.
If you want to turn those sheets into noodles, determine which cutter produces the shape you want.
If you want a roller plus the two common spaghetti and fettuccine cutters in one package, the KSMPRA is KitchenAid’s documented three-piece roller-and-cutter configuration.
The key is to identify the individual components, not just the phrase “KitchenAid pasta attachment.” Once you know whether you need a roller, a cutter, or both, choosing the correct product becomes much simpler.
KSMPSA vs. KSMPRA: What’s the Difference?
The KSMPSA and KSMPRA are closely related KitchenAid pasta products, but they are not the same package. The easiest way to tell them apart is to look at the components included with each model.
The KSMPSA is the standalone pasta roller. It is designed to roll pasta dough into flat sheets and includes a cleaning brush. The KSMPRA is a 3-piece pasta roller and cutter set that includes the pasta roller, a spaghetti cutter, a fettuccine cutter, and a cleaning brush. KitchenAid states that the KSMPRA fits all household KitchenAid stand mixers.
So the important difference is not that one uses a fundamentally different mixer connection. The difference is how much of the pasta-making system you receive in the package.
KSMPSA vs. KSMPRA at a Glance
| Feature | KSMPSA | KSMPRA |
|---|---|---|
| Product type | Pasta roller | Pasta roller and cutter set |
| Pasta roller | Yes | Yes |
| Spaghetti cutter | Not included | Included |
| Fettuccine cutter | Not included | Included |
| Cleaning brush | Included | Included |
| Pasta sheet width | Up to 6 inches | Up to 6 inches |
| Roller thickness settings | 8 | 8 |
| Mixer connection | KitchenAid stand mixer attachment hub | KitchenAid stand mixer attachment hub |
| Fits household KitchenAid stand mixers | Yes | Yes |
| Main purpose | Rolling pasta sheets | Rolling and cutting pasta |
| Additional cutters required for spaghetti/fettuccine | Yes | No |
| Model | KSMPSA | KSMPRA |
KitchenAid’s product documentation identifies KSMPSA as the pasta roller and KSMPRA as the package containing the roller, spaghetti cutter, and fettuccine cutter.
What You Get With the KSMPSA
The KSMPSA makes sense when the roller is the component you actually need.
It can turn prepared pasta dough into flat sheets, with eight thickness settings and a rolling width of up to 6 inches. That is enough for applications where the pasta remains in sheet form, such as preparing sheets for lasagna or ravioli.
It can also serve as the first stage of a noodle-making setup. If you later decide that you want spaghetti or fettuccine, you can add the appropriate compatible cutter rather than replacing the roller.
The important thing is to understand that KSMPSA does not mean “complete pasta cutter set.” KitchenAid identifies the KSMPSA as the pasta roller model.
What You Get With the KSMPRA
The KSMPRA combines three pasta-making attachments in one package:
- Pasta roller
- Spaghetti cutter
- Fettuccine cutter
- Cleaning brush
The roller creates the pasta sheet, while the two cutters turn that sheet into spaghetti or fettuccine. KitchenAid lists the set as being powered by a KitchenAid stand mixer and says it fits all household KitchenAid stand mixers.
This means you do not have to purchase the roller separately and then source the two common cutters individually if you want all three components together.
Which One Do You Need?
Instead of asking which model is “better,” start with what you actually want to make.
| Your situation | Relevant setup |
|---|---|
| You only need flat pasta sheets | KSMPSA |
| You already own compatible cutters and only need a roller | KSMPSA |
| You want to make pasta sheets and spaghetti | KSMPSA + spaghetti cutter, or KSMPRA |
| You want to make pasta sheets and fettuccine | KSMPSA + fettuccine cutter, or KSMPRA |
| You want both spaghetti and fettuccine cutters with the roller | KSMPRA |
| You want to expand to additional pasta shapes | Consider the individual cutters or a larger KitchenAid pasta set |
This approach also prevents an unnecessary duplicate purchase. For example, someone who already owns a KSMPSA does not need another pasta roller simply because they want to make spaghetti; the missing component may be the appropriate cutter.
What If You Already Own the KSMPSA?
If you already have the KSMPSA, you already have the roller portion of the system.
The next step is to identify which cutter you need.
For example:
KSMPSA + spaghetti cutter → spaghetti
KSMPSA + fettuccine cutter → fettuccine
KSMPSA alone → flat pasta sheets
KitchenAid’s accessory chart also identifies separate configurations such as KSMFETPRA, which combines a pasta roller with a fettuccine cutter, and KSMPDX, which includes the roller plus spaghetti, fettuccine, capellini, and lasagnette cutters.
That makes the model number useful for more than compatibility checking: it can tell you which components are actually in the package.
KSMPSA vs. KSMPRA: The Buying Difference
The simplest way to remember the distinction is:
KSMPSA = roller
KSMPRA = roller + spaghetti cutter + fettuccine cutter
Both use the KitchenAid stand mixer attachment system, and KitchenAid states that both are compatible with household KitchenAid stand mixers.
If you are replacing a damaged roller, adding a roller to an existing collection of cutters, or simply want to make flat pasta sheets, the KSMPSA is the relevant model to investigate.
If you want the roller and the two common noodle cutters together, the KSMPRA is the package that provides those components.
Before You Buy: Check the Box Contents
Product names can be surprisingly easy to misread, especially when several KitchenAid pasta attachments use similar terminology.
Before ordering, check three things:
- The exact model number
- The attachments listed as included
- Whether you already own any of those components
This is particularly important for Amazon and other retailer listings, where different KitchenAid pasta models may appear alongside one another.
The model number tells you what the product is; the included-components list tells you what you are actually getting.
What Is Included With KitchenAid Pasta Attachments?
KitchenAid sells several pasta attachments with similar names, but the contents of each package can be different. This is why checking the exact model number and included components is more useful than relying on a product title such as “KitchenAid pasta attachment.”
For the KSMPSA, the package contains the pasta roller attachment and cleaning brush. KitchenAid describes the roller as producing 6-inch-wide pasta sheets with eight thickness settings, and it can be used with KitchenAid pasta cutters sold separately.
The KSMPRA is a larger setup. Its package contains the pasta roller, spaghetti cutter, fettuccine cutter, and cleaning brush. The roller handles the sheet-making stage, while the two cutters provide the spaghetti and fettuccine cuts.
KSMPSA: What’s in the Box?
| Component | Included? | Purpose |
|---|---|---|
| Pasta roller | Yes | Rolls and thins pasta dough into sheets |
| Cleaning brush | Yes | Removes dried dough and flour from the attachment |
| Spaghetti cutter | No | Purchased separately |
| Fettuccine cutter | No | Purchased separately |
| Other pasta cutters | No | Purchased separately where compatible |
KitchenAid’s current product information identifies the KSMPSA as a pasta roller and specifically lists the roller attachment and cleaning brush as its two included accessories.
That means the KSMPSA can be used on its own when your goal is to produce flat pasta sheets. If you want to turn those sheets into spaghetti or fettuccine, you will need the appropriate cutter.
KSMPRA: What’s in the Box?
| Component | Included? | Purpose |
|---|---|---|
| Pasta roller | Yes | Rolls and thins pasta dough |
| Spaghetti cutter | Yes | Cuts sheets into spaghetti |
| Fettuccine cutter | Yes | Cuts sheets into fettuccine |
| Cleaning brush | Yes | Helps remove dried dough from the attachment |
KitchenAid’s current KSMPRA listing identifies these four included accessories. The manufacturer describes the product as a 3-piece roller-and-cutter set because the three main pasta attachments are the roller, spaghetti cutter, and fettuccine cutter; the cleaning brush is included as an additional accessory.
Other KitchenAid Pasta Attachment Configurations
The KSMPSA and KSMPRA are not the only model configurations you may encounter. KitchenAid’s published model chart identifies several pasta attachment combinations.
| Model | Pasta components included |
|---|---|
| KSMPSA | Pasta roller |
| KSMPRA | Pasta roller + spaghetti cutter + fettuccine cutter |
| KSMPCA | Capellini cutter + lasagnette cutter |
| KSMFETPRA | Pasta roller + fettuccine cutter |
| KSMPDX | Pasta roller + spaghetti cutter + fettuccine cutter + lasagnette cutter + capellini cutter |
KitchenAid’s current KSMPDX product page also lists a cleaning brush with the five pasta attachments.
This distinction matters because a model number does not simply tell you whether something is “a pasta attachment.” It can tell you which part of the pasta-making process the product is designed to perform.
Don’t Confuse “Included” With “Compatible”
A pasta cutter being compatible with your roller does not mean that the cutter is included in the package.
For example, the KSMPSA can work with KitchenAid pasta cutters, but the current KSMPSA product listing does not include the spaghetti and fettuccine cutters. Those are separate components.
This creates three different situations:
You own a roller but no cutters:
You can make flat pasta sheets, but you will need a compatible cutter for specific noodle shapes.
You own a roller and the required cutter:
You already have the components needed for that rolling-and-cutting workflow.
You buy a complete set:
The package may already contain the roller and several cutters, depending on the model.
Always check the “What’s included” or “Model includes” information before ordering.
Why the Cleaning Brush Matters
The cleaning brush is not a pasta-cutting component, but it is included with KitchenAid’s current KSMPSA and KSMPRA configurations. KitchenAid’s cleaning guidance says to let the attachment air-dry after use and then remove dried dough with the cleaning brush. The manufacturer advises against immersing the pasta attachments in water or putting them in the dishwasher.
This is important because pasta dough can dry inside the rollers and cutters. Cleaning the attachment according to the manufacturer’s instructions is part of maintaining the equipment.
A Simple Way to Check Your Existing Setup
If you already own a KitchenAid pasta attachment and are trying to determine what you have, look for the model number on the attachment, packaging, documentation, or product information.
Then compare that model with the component list.
For example:
- KSMPSA → roller
- KSMPRA → roller + spaghetti + fettuccine
- KSMPCA → capellini + lasagnette
- KSMFETPRA → roller + fettuccine
- KSMPDX → roller + four cutters
This is more reliable than identifying an attachment from its appearance alone, particularly when several KitchenAid pasta products look similar.
Before Ordering a Replacement or Additional Attachment
If you are replacing a missing or damaged component, do not automatically buy another complete set.
First determine:
- Which KitchenAid pasta model you already own
- Which components are already in your collection
- Which pasta shape or function you are missing
- Whether the replacement component is listed as compatible with your existing setup
For example, if you already own a KSMPSA and only want to make fettuccine, buying another roller may duplicate a component you already have. The relevant purchase may instead be a compatible fettuccine cutter.
Likewise, if you want spaghetti, identify the appropriate spaghetti cutter rather than assuming every KitchenAid pasta attachment includes one.
The safest buying habit is simple: identify the model first, check the included components second, and only then decide what additional attachment you need.
How to Find Your KitchenAid Mixer Model Number
If you are checking whether a KitchenAid pasta attachment will work with your mixer, finding the exact mixer model number is more reliable than trying to identify the mixer by its color, bowl size, or general appearance.
KitchenAid uses model numbers to identify specific stand mixers and provide the correct manuals, support information, parts, and product documentation. The model number is also useful when you are checking an older mixer or trying to determine exactly which attachment configuration you have. KitchenAid’s current guidance says the model and serial number label on a stand mixer is located underneath the base of the mixer.
Where Is the KitchenAid Stand Mixer Model Number?
For a KitchenAid stand mixer, look underneath the base of the machine.
KitchenAid recommends placing the mixer on a towel or another soft surface and carefully turning it over so you can inspect the identification label without damaging the mixer. The label contains both the model number and serial number.
The process is:
- Unplug the mixer.
- Place a towel or soft protective surface on your work area.
- Carefully tilt or turn the mixer so you can access the underside of the base.
- Locate the identification sticker.
- Look for the model number, rather than the serial number.
- Record the complete model number exactly as printed.
What Does a KitchenAid Model Number Look Like?
KitchenAid model numbers vary by generation, but many newer stand mixers use model numbers beginning with KSM, such as KSM150. Older models can use different formats, including model numbers beginning with K, such as K45. KitchenAid also notes that newer model numbers can contain additional letters at the end that identify a particular finish or configuration.
This is why you should record the entire model number instead of copying only the first few characters.
For example, if the label contains a longer model designation, don’t shorten it to simply “KSM.” The complete identifier gives you a much more useful reference when searching for manuals, replacement parts, or product information.
Model Number vs. Serial Number
These two numbers have different purposes.
| Number | What it identifies | Why you need it |
|---|---|---|
| Model number | The specific mixer model/configuration | Compatibility research, manuals, parts and product information |
| Serial number | The individual machine | Manufacturing information, registration and service |
| Both numbers | Your specific appliance | Customer support and service |
For a pasta-roller compatibility question, the model number is the first number to record.
Keep the serial number as well, however, because KitchenAid may request both numbers when providing support or service.
Do You Need the Model Number to Use the KSMPSA?
Not necessarily.
KitchenAid currently states that the KSMPSA fits all household KitchenAid stand mixers, so you do not normally need to identify your exact mixer model simply to establish basic KSMPSA compatibility.
However, finding your model number is still useful when you need to:
- verify information about an older or unusual mixer;
- find the correct owner’s manual;
- identify replacement parts;
- investigate other KitchenAid attachments;
- compare your mixer with older or discontinued models;
- contact KitchenAid support;
- confirm information when purchasing a replacement component.
In other words, the KSMPSA compatibility statement may answer the immediate question, but your mixer model number is still valuable for broader ownership and maintenance questions.
What If the Label Is Difficult to Read?
If the sticker underneath the mixer has become worn, damaged, or difficult to read, don’t immediately assume that you need to identify the mixer from its appearance.
Start with any documentation you still have, such as:
- the original owner’s manual;
- purchase documentation;
- previous service records;
- product-registration information;
- the original packaging, if available.
KitchenAid also provides an Owner’s Center where model numbers can be used to access appliance-specific resources.
If the model number is completely unreadable or missing, KitchenAid’s newer guidance says visual characteristics can sometimes help narrow down the mixer model, but the identification label remains the preferred starting point.
Don’t Identify Your Mixer by Color Alone
A KitchenAid stand mixer can be available in many finishes, and the same general mixer appearance can occur across different models or generations.
For compatibility research, descriptions such as:
- “I have a red KitchenAid”
- “I have a large KitchenAid”
- “I have a tilt-head”
- “I have a bowl-lift”
- “My mixer is about 10 years old”
are useful clues, but they are not the same as an exact model number.
When you need precise product information, use the identification label whenever possible.
What About Older or Vintage KitchenAid Mixers?
Older KitchenAid mixers deserve a little more care when you are researching compatibility because the product history includes multiple generations. KitchenAid currently distinguishes vintage, legacy, and current stand-mixer eras and notes that older models can differ in design and specifications.
That does not mean an older mixer should automatically be treated as incompatible with an attachment. It means you should avoid making assumptions based solely on age.
If you own an older or vintage KitchenAid and want to investigate attachment compatibility beyond the manufacturer’s current general compatibility statement, record the exact model number first.
Related guide: How to Find Your KitchenAid Mixer Model Number
A Simple Compatibility Workflow
When researching any KitchenAid attachment, use this order:
1. Identify the mixer model → 2. Identify the attachment model → 3. Check the manufacturer’s compatibility information → 4. Check exactly what components are included → 5. Buy only the component you actually need.
For the KSMPSA specifically, KitchenAid’s current product information provides the broad compatibility statement that it fits all household KitchenAid stand mixers. The model-number check becomes especially useful when you move beyond that basic question and start researching other attachments, replacement parts, or older mixer configurations.
The goal is not to memorize KitchenAid model numbers. It is to use the model number as your identification key whenever appearance alone is not enough.
How to Attach the KitchenAid Pasta Roller to Your Mixer
Once you have confirmed that you have the correct KitchenAid pasta roller, attaching it to the mixer is relatively straightforward. The roller connects to the front attachment hub of the stand mixer and is secured with the hub knob.
KitchenAid uses the same basic attachment procedure for its pasta roller and cutter attachments. The important part is making sure the attachment’s power shaft properly engages the square socket inside the hub and that the locating pin sits in the correct notch.
Before You Install the Pasta Roller
Before attaching the roller, turn the stand mixer off and unplug it. This prevents the mixer from accidentally starting while you are working around the attachment hub. KitchenAid specifically includes this as the first step in its installation instructions.
You should also make sure the attachment and mixer hub are free from anything that could interfere with the connection.
Step-by-Step Installation
1. Turn Off and Unplug the Mixer
Switch the stand mixer off and disconnect it from the electrical outlet.
Do not install or remove the pasta roller while the mixer is running.
2. Open the Attachment Hub
Locate the attachment hub at the front of the mixer.
Depending on the stand mixer model, the hub cover may either flip upward or be removed before the attachment is installed. KitchenAid’s instructions account for both hub-cover designs.
3. Position the Pasta Roller
Hold the pasta roller by its housing and line up its attachment shaft with the opening in the mixer hub.
The goal is for the roller’s power shaft to enter the square socket inside the attachment hub.
If the shaft does not immediately engage, KitchenAid recommends gently rotating the pasta roller back and forth while inserting it.
You should not need to force the attachment into the mixer.
4. Check the Locating Pin
Once the shaft is engaged, check the small locating pin on the attachment housing.
The pin should fit into the notch in the rim of the attachment hub. When the pin is positioned correctly, the roller should sit properly against the front of the mixer.
This is an important part of the installation because the attachment should not simply be held in place by tightening the knob.
5. Tighten the Attachment-Hub Knob
Once the roller is correctly seated, tighten the stand mixer’s attachment-hub knob until the attachment is securely held in position.
KitchenAid’s instructions specifically state that the knob should be tightened until the attachment is completely secured to the mixer.
What a Properly Installed Roller Should Look Like
Before turning the mixer on, check these four things:
| Check | Correct result |
|---|---|
| Attachment shaft | Engaged with the square hub socket |
| Locating pin | Sitting in the hub-rim notch |
| Attachment housing | Properly seated against the mixer |
| Hub knob | Tight enough to hold the attachment securely |
If all four are correct, the roller is ready for use.
If the Pasta Roller Won’t Slide Into the Hub
Don’t immediately assume that the roller is incompatible with your mixer.
The most common installation issue can simply be shaft alignment. The power shaft needs to engage with the square socket inside the hub. KitchenAid specifically recommends rotating the attachment back and forth if necessary while inserting it.
Try this sequence:
Remove the roller → check the hub opening → realign the shaft → gently rotate the roller → insert again → check the locating pin → tighten the hub knob.
Do not use excessive force to make the attachment fit.
If the Roller Goes In but Feels Loose
First check whether the attachment is fully seated and whether the locating pin is correctly positioned in the hub-rim notch.
Then check the attachment-hub knob. KitchenAid identifies proper hub engagement and tightening as part of troubleshooting when pasta attachments do not work correctly.
A loose attachment should not simply be ignored. Remove it, reinstall it correctly, and make sure the hub knob is properly tightened before operating the mixer.
If the Roller Is Installed but Does Not Turn
A properly mounted attachment still needs the mixer to be operating and the attachment shaft to be fully engaged.
KitchenAid’s troubleshooting guidance recommends checking that the mixer is plugged in, confirming the correct speed, and checking that the attachment is fully engaged with the hub socket.
For the pasta roller and cutters, KitchenAid’s current guidance specifies speed 4 for rolling and cutting in the 3-in-1 pasta attachment instructions.
However, the initial dough-kneading/conditioning stage has separate instructions and may use a different mixer speed. That distinction is important and will be covered in the pasta preparation and settings section later in this guide.
Do Not Use the Attachment for Other Materials
KitchenAid’s instructions state that these pasta roller and cutter attachments are designed for pasta dough and warn against cutting or rolling other materials because doing so can damage the attachment.
This is worth emphasizing because the roller can look like a general-purpose dough roller. It should not be treated as an all-purpose machine simply because other types of dough may physically pass through it.
How to Remove the Pasta Roller
When you are finished, turn the mixer off and unplug it before removing the attachment.
Remove the roller from the hub, then replace the attachment-hub cover and secure it according to the mixer design. KitchenAid’s removal instructions also emphasize cleaning dried dough from the attachment after use.
Quick Installation Checklist
Before using your KitchenAid pasta roller, confirm:
☐ Mixer is switched off during installation
☐ Mixer is unplugged
☐ Attachment-hub cover is open or removed
☐ Roller shaft is engaged with the square hub socket
☐ Locating pin is seated in the hub-rim notch
☐ Hub knob is tightened
☐ Roller is secure before the mixer is switched on
If the roller still will not seat correctly after checking these points, stop rather than forcing it. Recheck the attachment and mixer model information and consult the manufacturer’s instructions for the specific attachment.
The key installation principle is simple: the pasta roller should engage mechanically with the attachment hub before the hub knob is tightened. The knob secures a correctly positioned attachment; it should not be used to force an incorrectly aligned one into place.
KitchenAid Pasta Roller Settings: What Does Each Number Mean?
The KitchenAid pasta roller has eight thickness settings, numbered 1 through 8. These numbers control how thick or thin the pasta sheet becomes as it passes through the rollers.
The important thing to understand is that the roller setting and the mixer speed are two different controls. The roller setting determines the thickness of the pasta sheet, while the mixer speed controls how quickly the attachment operates.
For the KitchenAid pasta roller, the manufacturer recommends speed 4 for rolling and cutting. The thickness setting is then adjusted separately according to the type of pasta you are preparing.
KitchenAid Pasta Roller Settings Chart
| Roller setting | Pasta thickness/use | Typical applications |
|---|---|---|
| 1–2 | Thickest settings; kneading and initial thinning | Conditioning and thinning pasta dough |
| 3 | Thick sheet | Thick kluski-style noodles |
| 4 | Medium thickness | Egg noodles |
| 4–5 | Medium-thin sheet | Lasagna, fettuccine, spaghetti and ravioli |
| 6–7 | Thin sheet | Tortellini, thin fettuccine and linguine fini |
| 7–8 | Very thin sheet | Angel-hair-style pasta, capellini and very fine linguine |
These recommendations come directly from KitchenAid’s published pasta roller settings chart.
Setting 1: Start Here
Setting 1 is the widest/thickest roller position. It is normally where the prepared dough enters the roller for the first passes.
KitchenAid’s instructions use setting 1 for kneading and initially thinning the dough. The dough may be folded during these early passes to help develop a smooth, workable sheet.
Do not think of setting 1 as the final thickness for most pasta. It is generally the starting point before progressively moving toward thinner settings.
Setting 2: Continue Thinning
Setting 2 continues reducing the thickness of the sheet.
Once the dough has been conditioned at setting 1 and has become smooth and pliable, KitchenAid’s procedure moves the roller to setting 2 and feeds the dough through again. From there, the sheet can continue through higher settings until the desired thickness is reached.
Setting 3: Thick Pasta
Setting 3 produces a relatively thick pasta sheet and is listed by KitchenAid for thick kluski-style noodles.
This can be useful when you specifically want a thicker noodle rather than a thin sheet intended for delicate pasta.
Setting 4: Egg Noodles
Setting 4 is listed by KitchenAid for egg noodles.
It is also part of the broader 4–5 range KitchenAid gives for several common pasta applications, so the exact stopping point can depend on the recipe and the pasta shape you are making.
Settings 4–5: Lasagna, Fettuccine, Spaghetti and Ravioli
KitchenAid lists settings 4 or 5 for:
- Lasagna
- Fettuccine
- Spaghetti
- Ravioli
This is an important point because there is not necessarily one universal setting for every recipe. KitchenAid provides a range rather than saying that every batch of spaghetti, for example, must always be rolled to exactly the same setting.
If you are using a cutter, the final roller thickness should also be appropriate for the particular cutter and pasta you are preparing.
Settings 6–7: Thin Pasta
Settings 6 or 7 produce thinner sheets and are listed for:
- Tortellini
- Thin fettuccine
- Linguine fini
These settings are useful when the recipe calls for a more delicate pasta sheet.
Settings 7–8: Very Thin Pasta
Settings 7 or 8 are the thinnest positions on the roller.
KitchenAid lists these settings for very thin angel-hair-style pasta, capellini, or very fine linguine.
At these settings, the pasta sheet is considerably thinner than it was at the lower-numbered positions, so handling the dough carefully becomes increasingly important.
Does a Higher Number Mean Thicker Pasta?
No.
This is one of the easiest things to get backward.
On the KitchenAid roller:
Lower number = thicker sheet
Higher number = thinner sheet
So:
Setting 1 → thickest
Setting 8 → thinnest
KitchenAid’s instructions explicitly describe setting 1 as providing the thickest sheet, with each subsequent setting reducing the thickness.
What Speed Should the Mixer Be On?
Do not confuse the roller setting with the mixer speed.
For the pasta roller and cutter attachments, KitchenAid’s current support documentation states:
All rolling and cutting should be done at speed 4.
The mixer speed is controlled using the stand mixer’s speed selector, while the numbered dial on the pasta roller controls the thickness of the dough.
This gives you two separate controls:
| Control | What it changes |
|---|---|
| Mixer speed | How quickly the attachment operates |
| Roller setting 1–8 | Thickness of the pasta sheet |
Keeping these two controls separate makes the attachment much easier to understand.
How to Progress Through the Settings
You generally should not jump randomly between settings.
KitchenAid’s pasta-making procedure starts the dough at setting 1 and progressively increases the roller setting as the sheet becomes thinner. The manufacturer instructs users to continue increasing the setting until the desired thickness is reached.
A typical progression looks like this:
Setting 1 → Setting 2 → Setting 3 → Setting 4 → Setting 5 → Setting 6 → Setting 7 → Setting 8
You stop when the sheet reaches the thickness appropriate for what you are making.
You do not necessarily need to run every piece of dough through all eight settings. If the desired thickness is reached earlier, there is no reason to continue making the sheet thinner.
How Many Passes Should the Dough Make?
The number of passes depends on the stage of the process.
During the initial conditioning stage, KitchenAid’s instructions use repeated passes through setting 1, including folding the dough, until the dough becomes smooth and pliable. After that, the dough is progressively moved through higher settings without continuing the same folding process.
A simplified workflow is:
Condition the dough → Start at setting 1 → Fold and repeat during conditioning → Move to setting 2 → Increase settings progressively → Stop at the desired thickness → Cut or use the sheet
This is more useful than simply telling someone to “run the dough through the roller several times,” because the purpose of the passes changes during the process.
Flour the Dough Lightly When Necessary
KitchenAid recommends lightly dusting the pasta with flour during rolling and cutting to help prevent sticking.
The important word is lightly. You want enough flour to keep the sheet from sticking to the rollers or cutter without unnecessarily coating the dough with excess flour.
If the dough is excessively sticky, adding a small amount of flour and allowing the dough to become more workable can help. However, avoid treating flour as a substitute for properly prepared pasta dough.
Which Setting Should You Use for Your Pasta?
If you need a quick reference, use this starting chart:
| Pasta you are making | KitchenAid-recommended roller setting |
|---|---|
| Thick kluski-style noodles | 3 |
| Egg noodles | 4 |
| Lasagna | 4–5 |
| Fettuccine | 4–5 |
| Spaghetti | 4–5 |
| Ravioli | 4–5 |
| Tortellini | 6–7 |
| Thin fettuccine | 6–7 |
| Linguine fini | 6–7 |
| Angel-hair-style pasta / capellini | 7–8 |
| Very fine linguine | 7–8 |
These are KitchenAid’s published suggested uses, rather than a claim that every recipe must use exactly one setting. Dough composition, recipe requirements, and the desired finished texture can affect the final choice.
The Most Important Setting Rule
If you remember only three things from this section, remember these:
1. Setting 1 is the thickest.
2. Setting 8 is the thinnest.
3. KitchenAid specifies mixer speed 4 for rolling and cutting.
The numbered roller setting controls thickness; the mixer speed controls operation speed. Once you understand that distinction, the KitchenAid pasta roller becomes much easier to use correctly.
What Speed Should You Use With the KitchenAid Pasta Roller?
The mixer speed and the pasta roller setting control two different things.
For current KitchenAid guidance, rolling and cutting pasta with the newer pasta-attachment instructions should be done at Speed 4. KitchenAid’s current pasta-making instructions also use Speed 4 for both rolling and cutting.
The number on the front of the pasta roller is different. That number controls the thickness of the pasta sheet, not the mixer motor speed.
Mixer Speed vs. Roller Setting
| Control | What it controls | Typical setting |
|---|---|---|
| Stand mixer speed | How fast the attachment rotates | Speed 4 |
| Roller thickness setting | How thick or thin the pasta sheet becomes | 1–8 |
| Setting 1 | Thickest roller position | Start here |
| Setting 8 | Thinnest roller position | Finish here if needed |
So, for example, Speed 4 + Roller Setting 4 does not mean the same thing as “setting 4.” The first number refers to the mixer; the second refers to the roller thickness.
Why You May See Speed 2 in Older KitchenAid Instructions
There is an important documentation difference worth knowing if you are researching older KitchenAid pasta rollers.
Some older KitchenAid support documentation for the Pasta Sheet Roller instructs users to begin at Speed 2 or 4, and another older KitchenAid instruction page specifically describes using Speed 2 during the initial kneading/conditioning stage.
By comparison, KitchenAid’s newer 3-in-1 pasta attachment guidance states that all rolling and cutting should be done at Speed 4, and its current fresh-pasta recipe also uses Speed 4.
For a current setup, Speed 4 is therefore the clearest manufacturer-supported reference. If you are following an older manual that specifically gives a different speed, follow the instructions supplied for that particular attachment or manual.
A Simple Speed-and-Setting Workflow
For a typical pasta-making session:
- Attach the pasta roller to the mixer hub.
- Set the roller to 1, the thickest position.
- Set the mixer to Speed 4 when following the current KitchenAid instructions.
- Feed the prepared dough through the roller.
- Condition the dough until it becomes smooth and pliable.
- Progress through the roller settings to reach the thickness you need.
- If using a separate cutter, change to the desired cutter.
- Continue at Speed 4 for cutting under the current KitchenAid guidance.
What If the Attachment Does Not Turn?
If the roller or cutter is not moving, changing the roller thickness setting is not the first thing to check.
KitchenAid’s troubleshooting guidance recommends checking that:
- the mixer is plugged in and operating;
- the attachment is fully engaged with the hub socket;
- the attachment pin is correctly positioned in the hub notch;
- the hub knob is tightened; and
- the mixer is being operated at the appropriate speed.
If the attachment still does not operate, turn the mixer off for 10–15 seconds and restart it. KitchenAid’s troubleshooting instructions also recommend allowing the mixer to cool for 30 minutes if it still does not start.
The Rule to Remember
Use the mixer speed to control how fast the attachment operates. Use the roller number to control pasta thickness.
For current KitchenAid instructions, the practical combination is:
Mixer: Speed 4 → Roller: start at 1 → progressively increase the roller setting until the desired thickness is reached.
Do not assume that roller setting 4 means mixer speed 4. They are separate controls, even though Speed 4 happens to be the current recommended mixer speed.
KitchenAid Pasta Roller Troubleshooting
If your KitchenAid pasta roller is not working properly, do not immediately assume that the attachment is defective. Problems with the roller are often related to attachment alignment, mixer speed, dough consistency, roller thickness, or cleaning and maintenance.
Use the symptom below to narrow down the problem before replacing the attachment.
KitchenAid Pasta Roller Troubleshooting Chart
| Problem | Likely cause | What to check |
|---|---|---|
| Roller does not turn | Attachment is not fully engaged | Remove and reinstall it, making sure the power shaft enters the square hub socket |
| Roller does not turn | Hub knob is loose | Tighten the attachment hub knob |
| Roller does not turn | Mixer is not operating correctly | Check the outlet, mixer power and circuit |
| Roller does not turn | Incorrect operating speed | Follow the speed specified for your attachment |
| Dough sticks to the roller | Dough is too wet | Add a small amount of flour and work the dough again |
| Dough tears or develops holes | Dough is too thin | Move to a thicker roller setting |
| Dough is difficult to roll | Dough is too dry or poorly prepared | Check the dough consistency and allow it to rest |
| Dough keeps sticking together | Too much moisture | Lightly flour the dough before subsequent passes |
| Roller becomes difficult to operate | Dough buildup or lack of maintenance | Clean the attachment correctly and check its condition |
| Mixer stops while using the attachment | Mixer protection or operating problem | Turn it off, wait 10–15 seconds, and restart; if necessary, allow it to cool |
| Pasta sheet is uneven | Dough is not conditioned evenly | Fold and reroll the dough before progressing through the settings |
1. The Pasta Roller Is Not Turning
Start with the attachment itself rather than assuming the roller mechanism has failed.
Turn the mixer off and check that the pasta roller is fully inserted into the front attachment hub. The power shaft must engage the square socket, the locating pin must sit in the hub notch, and the hub knob must be tightened securely. KitchenAid specifically recommends rotating the attachment slightly back and forth during installation if necessary to help the shaft engage correctly.
Then check the mixer itself:
- Is it plugged into a working outlet?
- Does the mixer turn on normally?
- Is the attachment seated completely?
- Is the hub knob tightened?
- Are you using the appropriate speed for your particular attachment instructions?
For the current 3-in-1 KitchenAid pasta attachment guidance, KitchenAid specifies Speed 4 for rolling and cutting.
2. The Dough Is Sticking to the Roller
Sticky dough is usually a dough-consistency problem, not a compatibility problem.
KitchenAid’s current troubleshooting guidance says dough that is too wet can stick to the attachment and recommends adding flour gradually until the dough becomes workable.
Try this:
- Stop the mixer.
- Remove the dough from the roller.
- Lightly dust the dough with flour.
- Work the flour into the dough rather than coating it heavily.
- Run it through the roller again.
- Continue using only enough flour to prevent sticking.
Avoid adding a large amount of flour at once. Excess flour can make the finished pasta unnecessarily dry or brittle.
3. The Pasta Sheet Is Tearing or Developing Holes
If the sheet starts breaking apart as you make it thinner, you may have moved to a thickness setting that is too thin for the dough.
KitchenAid specifically identifies rolling the dough too thin as one possible cause of holes or tears and recommends moving back to a thicker setting.
Try moving back one or more settings and passing the dough through again.
Also check the dough itself. Very dry dough can become brittle and crack rather than stretching smoothly through the rollers.
4. The Dough Is Too Dry and Crumbly
Pasta dough that refuses to come together can be difficult to roll regardless of how good the attachment is.
KitchenAid describes excessively dry dough as crumbly, stiff and difficult to bring into a cohesive ball.
If the dough is genuinely too dry, adjust the moisture gradually according to the recipe rather than adding a large amount of water at once.
KitchenAid’s pasta-dough guidance recommends adding water a little at a time when the dough is too dry.
5. The Dough Keeps Springing Back
Freshly kneaded pasta dough can resist being rolled because the gluten structure is still tight.
Allowing the dough to rest before rolling gives it time to relax and makes it easier to flatten.
KitchenAid’s current pasta-dough guidance recommends resting the dough before putting it through the roller; the exact rest period varies between KitchenAid instructions and recipes, so follow the recipe or instructions supplied with your particular attachment.
If the dough repeatedly shrinks back after passing through the roller, give it additional resting time rather than immediately forcing it through a thinner setting.
6. The Pasta Sheet Is Uneven
Uneven sheets can occur when the initial piece of dough is irregular or when the dough has not been properly conditioned.
A useful approach is:
Start thick → fold → reroll → gradually reduce thickness.
Begin at the thickest roller setting and progressively move toward the desired thickness. KitchenAid’s roller instructions use this progressive approach rather than jumping directly to the thinnest setting.
Try to feed the dough into the roller straight and centered rather than allowing one side to enter substantially ahead of the other.
7. The Mixer Stops While Using the Pasta Roller
If the mixer suddenly stops, turn it off and wait 10–15 seconds before trying again.
KitchenAid’s troubleshooting instructions say that if the mixer still does not start, allow it to cool for approximately 30 minutes before trying again.
Before restarting, also check:
- the electrical outlet;
- the mixer connection;
- attachment installation;
- the hub knob;
- the operating speed; and
- whether the dough is prepared correctly.
If the mixer repeatedly stops during normal use after these checks, the problem may be with the mixer rather than the pasta attachment.
8. The Roller Is Difficult to Turn
If the attachment is correctly installed but the roller is unusually difficult to operate, inspect the dough first.
Excessively wet dough can stick to the roller, while excessively dry dough can resist the rollers and break apart.
The attachment may also require routine lubrication. KitchenAid recommends using light mineral oil on the gears periodically, with its instructions specifying annual lubrication or lubrication after approximately 50 uses.
Do not pour oil onto the pasta-contacting surfaces or attempt to lubricate the attachment while it is operating.
9. The Attachment Is Loose in the Hub
Stop the mixer before checking the attachment.
Remove it and reinstall it carefully:
- Open the attachment hub.
- Insert the attachment shaft into the square socket.
- Rotate the attachment slightly if necessary to engage the shaft.
- Make sure the locating pin enters the hub notch.
- Tighten the hub knob firmly.
- Check that the attachment no longer moves excessively before operating the mixer.
KitchenAid’s installation instructions specifically identify correct shaft engagement, pin positioning and hub-knob tightening as part of proper attachment installation.
Do not attempt to compensate for a poorly seated attachment by forcing the hub knob excessively tight.
10. How to Know Whether the Problem Is the Dough or the Attachment
A simple diagnostic sequence can prevent unnecessary replacement.
If the roller does not rotate at all:
Check the mixer, attachment installation, hub socket, pin and hub knob first.
If the roller rotates but the dough sticks:
Check dough moisture and use a light dusting of flour.
If the dough passes through but tears:
Check whether the roller is set too thin and whether the dough is too dry.
If the dough repeatedly springs back:
Allow it to rest before continuing.
If the mixer itself repeatedly stops:
Troubleshoot the mixer separately rather than assuming the pasta roller is responsible.
When Should You Stop Troubleshooting?
Stop using the attachment if you notice physical damage, abnormal mechanical behavior, persistent failure after correct installation, or a problem that cannot be explained by the dough, speed, setting or installation.
At that point, consult KitchenAid support or the documentation for your specific mixer and attachment rather than attempting to disassemble the roller yourself.
Quick Diagnostic Checklist
Before replacing a KitchenAid pasta roller, check these items in order:
1. Mixer works normally →
2. Attachment is fully seated →
3. Hub knob is tightened →
4. Correct mixer speed is being used →
5. Dough has the correct consistency →
6. Dough has rested appropriately →
7. Roller is not being set too thin →
8. Attachment is clean and properly maintained →
9. Mixer does not repeatedly stop →
10. No visible damage or abnormal mechanical behavior
This sequence separates the most common installation, dough, setting and maintenance problems from problems that may actually require service.
What Can You Put Through a KitchenAid Pasta Roller?
The answer depends on which KitchenAid pasta roller you have.
For the KSMPSA Pasta Roller, KitchenAid’s published documentation has traditionally stated that the attachment is designed for pasta dough only and warns against rolling or cutting other materials. KitchenAid’s current product-tips page for the pasta roller also describes it as being designed for pasta dough only.
However, KitchenAid’s newer 3-in-1 Pasta Attachment documentation specifically says its roller can also be used for other doughs, including dumpling wrappers, flour tortillas, phyllo dough, pizza dough, naan and roti, as well as fondant.
That distinction matters when deciding what is safe to put through your particular attachment.
What the KSMPSA Is Designed For
The KSMPSA is primarily a pasta-sheet roller.
You can use it to prepare sheets for foods such as:
| Food | How the roller is used |
|---|---|
| Lasagna | Roll sheets to the required thickness |
| Ravioli | Roll sheets before filling and shaping |
| Tortellini | Roll thin pasta sheets before forming |
| Fettuccine | Roll the sheet before using a fettuccine cutter |
| Spaghetti | Roll the sheet before using a spaghetti cutter |
| Angel hair/capellini | Roll very thin sheets before using the appropriate cutter |
| Linguine | Roll the sheet to the required thickness before cutting |
| Homemade pasta sheets | Roll without using a cutter |
KitchenAid’s roller-setting chart associates different thickness settings with different pasta types. Settings 1–2 are used for kneading and initial thinning, while higher settings progressively produce thinner sheets.
What About Dumpling Wrappers, Tortillas or Pizza Dough?
This is where it is important not to mix the instructions for different KitchenAid pasta attachments.
KitchenAid’s current 3-in-1 Pasta Attachment documentation specifically lists dumpling wrappers, flour tortillas, phyllo dough, pizza dough, naan and roti as additional uses for that attachment.
KitchenAid’s newer 3-in-1 product pages likewise promote the roller for several types of dough beyond pasta.
The older KSMPSA/roller documentation, however, says the pasta roller and cutters are designed for pasta dough only.
Therefore, this guide should not tell a KSMPSA owner that KitchenAid officially approves every one of those alternative doughs.
KSMPSA vs. Newer 3-in-1 Attachments
| Use | KSMPSA | Newer 3-in-1 KitchenAid attachment |
|---|---|---|
| Pasta dough | Yes | Yes |
| Lasagna sheets | Yes | Yes |
| Ravioli sheets | Yes | Yes |
| Fettuccine preparation | Yes, with appropriate cutter | Yes |
| Spaghetti preparation | Yes, with appropriate cutter | Yes |
| Dumpling wrappers | Follow KSMPSA documentation | KitchenAid explicitly lists this use |
| Flour tortillas | Follow KSMPSA documentation | KitchenAid explicitly lists this use |
| Phyllo dough | Follow KSMPSA documentation | KitchenAid explicitly lists this use |
| Pizza dough | Follow KSMPSA documentation | KitchenAid explicitly lists this use |
| Naan | Follow KSMPSA documentation | KitchenAid explicitly lists this use |
| Roti | Follow KSMPSA documentation | KitchenAid explicitly lists this use |
| Fondant | Not established for KSMPSA | KitchenAid lists it for the newer 3-in-1 guidance |
The important point is that compatibility and intended use are two different questions.
A dough may physically pass through a roller without that meaning KitchenAid officially recommends using that dough with the particular attachment.
What About Pasta Shapes?
The KSMPSA itself only rolls the dough into a flat sheet.
It does not automatically turn that sheet into spaghetti, fettuccine or other noodle shapes.
The basic workflow is:
Pasta dough → KSMPSA roller → flat pasta sheet → compatible cutter → finished noodles
For example:
- Lasagna: roller alone can produce the sheet.
- Ravioli: roller produces the sheet; the ravioli is then filled and shaped using the appropriate method.
- Fettuccine: roller + fettuccine cutter.
- Spaghetti: roller + spaghetti cutter.
- Other noodle shapes: roller + the appropriate compatible cutter.
KitchenAid’s published accessory chart separates the pasta roller from the various cutter attachments, so buyers should check what is actually included with their particular package.
Does the Roller Setting Determine the Pasta Shape?
No.
The roller setting primarily determines sheet thickness.
The final noodle shape comes from the cutter.
For example:
| Desired result | Roller | Cutter |
|---|---|---|
| Lasagna sheet | Required | None |
| Ravioli sheet | Required | None |
| Fettuccine | Required | Fettuccine cutter |
| Spaghetti | Required | Spaghetti cutter |
| Capellini/angel hair | Required | Appropriate fine-pasta cutter |
This is why buying a pasta roller alone may not give you every pasta shape shown in product photographs.
What Should You Put Through the Roller?
If you own a KSMPSA, the safest content recommendation is simple:
Use it according to the KSMPSA’s pasta-dough instructions and do not assume that uses approved for a newer 3-in-1 attachment automatically apply to it.
If you own a newer KitchenAid 3-in-1 attachment, follow the documentation for that specific model because KitchenAid has explicitly expanded the listed uses for those newer attachments.
A Practical Rule for Buyers
Before experimenting with a different dough, identify the exact attachment model number.
Do not rely solely on the attachment’s appearance because several KitchenAid pasta products can look similar while having different instructions and included components.
If you are unsure which attachment you have, check the model number printed on the product or packaging and compare it with the manufacturer’s documentation.
That approach is more reliable than assuming that every KitchenAid pasta roller has identical approved uses.
Which KitchenAid Pasta Setup Do You Need?
The right KitchenAid pasta attachment depends on what you want to make, not simply which attachment has the most pieces.
The key distinction is straightforward:
- KSMPSA = pasta roller
- KSMPRA = pasta roller + spaghetti cutter + fettuccine cutter
- KSMPCA = capellini cutter + lasagnette cutter
- KSMFETPRA = pasta roller + fettuccine cutter
- KSMPDX = pasta roller + spaghetti + fettuccine + capellini + lasagnette cutters
KitchenAid’s published accessory chart identifies which roller and cutters are included with each model.
Choose the Attachment Based on What You Want to Make
| What you want to make | What you need |
|---|---|
| Lasagna sheets | KSMPSA pasta roller |
| Ravioli sheets | KSMPSA pasta roller |
| Flat pasta sheets | KSMPSA pasta roller |
| Fettuccine | Pasta roller + fettuccine cutter |
| Spaghetti | Pasta roller + spaghetti cutter |
| Fettuccine + spaghetti | KSMPRA |
| Fettuccine only | KSMFETPRA or a compatible fettuccine cutter with a roller |
| Capellini + lasagnette | KSMPCA, when paired with the required roller for sheet preparation |
| Multiple pasta cutter options | KSMPDX |
The important point is that a cutter cannot replace the roller. The dough must first be flattened into a pasta sheet before it can be passed through a noodle cutter.
If You Only Need Pasta Sheets
If your main goal is:
- lasagna;
- ravioli;
- tortellini;
- homemade pasta sheets; or
- preparing sheets that you will cut manually,
the KSMPSA provides the roller function you need.
KitchenAid states that the KSMPSA produces pasta sheets up to approximately 6 inches wide and provides 8 thickness settings.
There is no reason to buy a cutter set simply because it contains more pieces if you do not intend to use those cutters.
If You Want Spaghetti and Fettuccine
If you regularly want both classic spaghetti and fettuccine, the KSMPRA combines the three core components:
- Pasta roller
- Spaghetti cutter
- Fettuccine cutter
KitchenAid currently lists those three attachments in the KSMPRA package, along with a cleaning brush.
The workflow is:
Dough → pasta roller → flat sheet → spaghetti or fettuccine cutter
This means the roller remains necessary even when your final goal is a particular noodle shape.
If You Already Own the KSMPSA
You do not necessarily need to replace the roller.
If you already own a KSMPSA, you already have the sheet-rolling component. Your next purchase can be based on the pasta shape you actually want to produce.
For example:
Already own KSMPSA + want fettuccine
→ Look for the appropriate compatible fettuccine cutter.
Already own KSMPSA + want spaghetti
→ Look for the appropriate compatible spaghetti cutter.
Already own KSMPSA + want both
→ Compare the cost and contents of the additional cutters against a complete set before buying another roller.
This prevents paying for a second roller when the component you actually need is a cutter.
If You Want a Complete Pasta Setup
KitchenAid’s KSMPRA is the three-piece roller-and-cutter configuration containing the roller, spaghetti cutter and fettuccine cutter.
The KSMPDX is the larger five-piece configuration containing:
- pasta roller;
- spaghetti cutter;
- fettuccine cutter;
- capellini cutter; and
- lasagnette cutter.
KitchenAid’s accessory chart identifies those components as part of the KSMPDX configuration.
That makes the KSMPDX relevant for someone who specifically wants access to a wider range of cutter types rather than simply needing a pasta roller.
KSMPSA vs. KSMPRA vs. KSMPDX
| Feature | KSMPSA | KSMPRA | KSMPDX |
|---|---|---|---|
| Pasta roller | ✓ | ✓ | ✓ |
| Spaghetti cutter | — | ✓ | ✓ |
| Fettuccine cutter | — | ✓ | ✓ |
| Capellini cutter | — | — | ✓ |
| Lasagnette cutter | — | — | ✓ |
| Best suited to | Rolling sheets | Common pasta shapes | Wider variety of cutter options |
The choice therefore comes down to which functions you actually need.
What If You Only Want Fettuccine?
KitchenAid’s accessory chart lists the KSMFETPRA as a combination containing the pasta roller and fettuccine cutter.
That configuration is worth knowing about because someone searching specifically for a fettuccine setup does not necessarily need the full three-piece KSMPRA set.
What If You Want Capellini or Lasagnette?
KitchenAid lists KSMPCA as the configuration containing the capellini and lasagnette cutters.
Because those are cutters rather than the pasta roller, you still need the appropriate roller component to prepare the sheet before cutting.
This is an important distinction when shopping for individual attachments:
A pasta cutter cuts the sheet. A pasta roller creates the sheet.
Buying the Right Configuration
Before purchasing, check these four things:
1. Identify your existing attachment
Look for the model number rather than relying on the attachment’s appearance.
2. List the pasta shapes you actually want
For example:
- sheets only;
- fettuccine;
- spaghetti;
- fettuccine + spaghetti;
- several cutter types.
3. Check what is already included
Do not assume a product called a “pasta set” contains every cutter.
KitchenAid’s model chart exists specifically to show which rollers and cutters belong to each configuration.
4. Compare the cost of adding a component with buying a complete set
If you already own the roller, buying another package containing a duplicate roller may not be the most efficient way to obtain one missing cutter.
A Simple Decision Path
Use this sequence:
I only need flat pasta sheets
→ KSMPSA
I need spaghetti and fettuccine
→ KSMPRA
I mainly want fettuccine with a roller included
→ KSMFETPRA
I want capellini and lasagnette cutters
→ KSMPCA + an appropriate roller
I want the widest cutter selection in one configuration
→ KSMPDX
I already own a KSMPSA
→ Check which cutter you are missing before buying another roller.
One More Compatibility Check
KitchenAid currently states that the KSMPRA fits all household KitchenAid stand mixers, and the same broad household-mixer compatibility applies to the KSMPSA product line.
However, compatibility does not tell you what is included.
A mixer can be compatible with several pasta attachments while each attachment package contains a different combination of rollers and cutters.
That is why the safest buying process is:
Mixer compatibility → attachment model → included components → pasta shape you want → missing component → purchase.
Where to Buy a KitchenAid Pasta Roller and Which One to Choose
Once you know which pasta attachment you need, the next step is choosing where to buy it.
The most important thing is to shop by model number and included components, not simply by a product photograph or a listing title.
KitchenAid currently identifies the KSMPSA as the standalone Pasta Roller, while the KSMPRA is the 3-Piece Pasta Roller & Cutter Set. KitchenAid also lists the larger KSMPDX 5-Piece Pasta Deluxe Set.
KitchenAid Pasta Attachments at a Glance
| Product | What you get | Best for |
|---|---|---|
| KSMPSA | Pasta roller + cleaning brush | Pasta sheets, lasagna and ravioli preparation |
| KSMPRA | Pasta roller + spaghetti cutter + fettuccine cutter + cleaning brush | Making both spaghetti and fettuccine |
| KSMPDX | Pasta roller + spaghetti + fettuccine + capellini + lasagnette cutters | A broader selection of pasta shapes |
KitchenAid’s current product information confirms the KSMPRA includes the roller, fettuccine cutter, spaghetti cutter and cleaning brush. Its published accessory chart also shows the cutter configuration for KSMPDX.
Buy the KSMPSA If You Only Need the Roller
The KSMPSA is the appropriate configuration when you primarily need to flatten pasta dough into sheets.
It is particularly useful for:
- lasagna sheets;
- ravioli preparation;
- tortellini preparation;
- homemade pasta sheets; and
- dough that you intend to cut manually.
KitchenAid currently identifies the KSMPSA as a Pasta Roller and lists it with its other stand-mixer attachments.
Amazon:
[Check the current KSMPSA listing on Amazon]
Before purchasing, verify that the listing specifically identifies the product as KSMPSA and check the current “What’s included” information.
Buy the KSMPRA If You Want Spaghetti and Fettuccine
The KSMPRA combines the roller with two cutters:
- spaghetti;
- fettuccine.
KitchenAid currently describes the KSMPRA as a 3-Piece Pasta Roller & Cutter Set and says it includes those three attachments plus a cleaning brush.
Amazon:
[Check the current KSMPRA listing on Amazon]
This is especially useful when you do not already own a KitchenAid pasta roller and want a basic roller-and-cutter setup rather than purchasing the components individually.
Consider the KSMPDX If You Want More Cutter Options
The KSMPDX expands the setup with additional cutter types.
KitchenAid’s accessory chart identifies the KSMPDX configuration with:
- pasta roller;
- spaghetti cutter;
- fettuccine cutter;
- capellini cutter; and
- lasagnette cutter.
KitchenAid currently lists the KSMPDX as a 5-Piece Pasta Deluxe Set.
Amazon:
[Check the current KSMPDX listing on Amazon]
This configuration makes more sense when you specifically want the additional cutter options. If you only make lasagna, ravioli, spaghetti and fettuccine, the extra cutters may not be necessary.
If You Already Own a KSMPSA
This is where checking the product model before buying becomes particularly important.
If you already have the KSMPSA, do not automatically buy another complete pasta set just because you want a different pasta shape.
Instead:
KSMPSA already owned
↓
Identify the pasta shape you want
↓
Identify the cutter required
↓
Check whether that cutter is sold separately or included in a compatible set
↓
Compare the cost before purchasing
For example, if your KSMPSA is working correctly and you only want fettuccine, the roller itself is not the missing component.
How to Verify an Amazon Listing Before Buying
Amazon listings can contain multiple versions, bundles or seller-specific packages, so check the product details before clicking the purchase button.
Look for these five things:
1. Exact model number
Confirm that the listing identifies the product as KSMPSA, KSMPRA or KSMPDX, depending on what you intend to buy.
2. Included components
Do not assume that a photograph showing several attachments means all of them are included.
For example, KitchenAid’s KSMPRA officially includes the roller, spaghetti cutter, fettuccine cutter and cleaning brush.
3. Compatibility statement
The listing should identify compatibility with KitchenAid household stand mixers. If the seller’s description is unclear, verify the model against KitchenAid’s own documentation.
4. Seller
Check who is actually selling the product and whether the listing is for a new, used, refurbished or replacement item.
5. Model number in the product specifications
The model number in the specifications should match the model number in the title and description.
Do Not Buy Based Only on the Product Photo
Several KitchenAid pasta attachments have a similar stainless-steel appearance.
That makes visual comparison unreliable.
A listing can show:
Roller + spaghetti cutter + fettuccine cutter
while the actual product being sold may be only the roller.
Always verify the model number and package contents.
KitchenAid’s own accessory chart is useful for this because it separates the roller from the individual cutter configurations.
Price Comparison: Check the Current Price, Not an Old Article Price
Prices for KitchenAid attachments can change because of sales, availability, sellers and location.
For example, KitchenAid’s current U.S. product listings recently displayed the KSMPSA at $129.99, KSMPRA at $249.99, and KSMPDX at $379.99. Those are current displayed prices from KitchenAid’s U.S. site and should not be treated as permanent prices or as the price available in every country.
For this reason, this guide should not hard-code an Amazon price.
Instead, use a button such as:
Check current price on Amazon →
This keeps the article useful when the retailer changes its price.
Amazon Affiliate Disclosure
If this page contains Amazon affiliate links, place a short disclosure near the first commercial recommendation.
For example:
Affiliate disclosure: Some links on this page are affiliate links. If you purchase through one of these links, we may earn a commission at no additional cost to you.
The disclosure should be visible to readers. Affiliate links should also be marked appropriately in the HTML, such as:
<a href="YOUR-AMAZON-AFFILIATE-LINK"
   rel="sponsored nofollow">
  Check current price on Amazon
</a>
Do not hide the affiliate relationship behind generic buttons or JavaScript-only elements.
Recommended Placement of Amazon Links
The page does not need an Amazon button after every paragraph.
A cleaner structure is:
After the buying-decision section
Looking for the KSMPSA?
Check the current Amazon listing and verify the model number and included components before purchasing.
After the KSMPSA vs. KSMPRA comparison
Need spaghetti and fettuccine too?
Check the current KSMPRA listing.
Near the end of the article
Provide a compact comparison:
| Product | Main purpose | Amazon |
|---|---|---|
| KSMPSA | Roller only | Check current price |
| KSMPRA | Roller + spaghetti + fettuccine | Check current price |
| KSMPDX | Roller + five pasta attachments | Check current price |
This gives readers a buying path without turning the compatibility guide into a collection of advertisements.
The Most Important Buying Rule
Before purchasing a KitchenAid pasta attachment, verify these three things:
Model number → Included components → Intended use
If those three match what you need, you have a much lower chance of buying a duplicate roller, missing a required cutter, or confusing a product photo with the actual package contents.
And if you already own the KSMPSA, start by asking:
“What component am I actually missing?”
That question can save you from purchasing an entire pasta set when a single compatible cutter is all you need.
Frequently Asked Questions
Does the KitchenAid KSMPSA pasta roller fit all KitchenAid stand mixers?
KitchenAid currently states that the KSMPSA pasta roller fits all household KitchenAid stand mixers. It connects through the mixer’s front attachment hub rather than the bowl or beater shaft. If you have an older or vintage KitchenAid mixer and want to verify a particular attachment or replacement part, checking the exact mixer model number is still useful.
What is the difference between KSMPSA and KSMPRA?
The KSMPSA is the standalone pasta roller, while the KSMPRA is a roller-and-cutter set. The current KSMPRA package includes the pasta roller, spaghetti cutter, fettuccine cutter and cleaning brush. Both configurations are designed to connect to the KitchenAid stand mixer’s attachment hub. If you only need pasta sheets, the roller configuration is sufficient; if you want to make spaghetti and fettuccine with the included cutters, the KSMPRA provides those additional components.
Can I make spaghetti with the KSMPSA?
The KSMPSA can roll the pasta sheet needed to make spaghetti, but the roller itself does not cut the sheet into spaghetti strands. You need a compatible spaghetti cutter after rolling the dough. The basic process is pasta dough → KSMPSA roller → flat sheet → spaghetti cutter. This is why it is important to distinguish the pasta roller from the individual pasta cutters when checking what is included in a product package.
What thickness setting should I use on a KitchenAid pasta roller?
KitchenAid pasta rollers have eight thickness settings, with setting 1 producing the thickest sheet and setting 8 producing the thinnest. KitchenAid’s published chart associates different pasta types with different ranges: settings 4–5 are used for preparations such as lasagna, fettuccine, spaghetti and ravioli, while settings 6–8 are used for progressively thinner pasta. The exact stopping point depends on the pasta you are making and the recipe being followed.
What speed should a KitchenAid pasta roller use?
KitchenAid’s current 3-in-1 pasta-attachment guidance specifies Speed 4 for rolling and cutting. The mixer speed should not be confused with the roller’s numbered thickness settings. The mixer speed controls how quickly the attachment rotates, while the roller setting controls the thickness of the pasta sheet. Some older KitchenAid documentation gives different instructions for particular pasta-roller procedures, so the instructions supplied for your specific attachment should take precedence.
Why isn’t my KitchenAid pasta roller turning?
First, turn the mixer off and check that the attachment is fully seated in the front hub. The attachment’s power shaft needs to engage the square socket, the locating pin needs to sit correctly in the hub notch, and the hub knob needs to be tightened. Also check that the mixer is operating normally and that you are using the appropriate speed. If the mixer stops unexpectedly, KitchenAid recommends turning it off briefly and restarting it; if it still does not start, its troubleshooting guidance recommends allowing the mixer to cool before trying again.
Final Thoughts
The KitchenAid KSMPSA Pasta Roller is designed to fit all household KitchenAid stand mixers and connects through the mixer’s front attachment hub.
The important distinction is what the attachment actually does:
- KSMPSA rolls pasta dough into flat sheets.
- A spaghetti cutter turns a sheet into spaghetti.
- A fettuccine cutter turns a sheet into fettuccine.
- KSMPRA combines the roller with spaghetti and fettuccine cutters.
- Larger configurations such as KSMPDX include additional pasta cutters.
The KSMPSA has eight thickness settings and produces pasta sheets up to approximately 6 inches wide. For current KitchenAid guidance, rolling and cutting are performed at Speed 4, while the numbered roller setting controls sheet thickness.
If you already own a KSMPSA, you generally do not need another roller simply because you want a different pasta shape. Identify the cutter you need, verify its compatibility and check what is included before purchasing.
The simplest compatibility workflow is:
Identify the mixer → identify the pasta attachment → verify compatibility → check included components → choose the missing component → buy.
That approach is more reliable than choosing a KitchenAid pasta attachment based only on its appearance or a retailer’s product photograph.
Related KitchenAid Compatibility Guides
KitchenAid attachment compatibility can involve more than the pasta roller itself. If you are trying to identify a mixer, check another attachment, or determine whether an older KitchenAid will accept a newer accessory, the following guides can help.
Identify Your KitchenAid Mixer
Before checking compatibility for individual accessories, identify the exact mixer model.
How to Find Your KitchenAid Mixer Model Number
The model number is more useful than the mixer’s color, appearance or bowl size when you need to identify a specific appliance or find documentation and parts.
Check KitchenAid Attachment Compatibility
If you are researching attachments beyond pasta rollers, use the broader compatibility guide:
KitchenAid Attachment Compatibility Guide
This is the logical next step when you want to know whether a particular KitchenAid attachment works with your mixer.
KitchenAid’s own attachment guidance explains that its power-hub attachments are designed around the stand mixer’s attachment hub and provides a compatibility-selection process for different mixers.
Have an Older or Vintage KitchenAid Mixer?
If your mixer is several decades old, you may be wondering whether a modern attachment will fit it.
Do Modern Attachments Fit Vintage KitchenAid Mixers?
This guide goes deeper into model identification and attachment compatibility for older machines.
Looking for a Different KitchenAid Bowl?
If your question is about whether one KitchenAid bowl can be used on another mixer, the relevant issue is different from pasta-attachment compatibility.
Are KitchenAid Mixer Bowls Interchangeable?
The pasta roller connects to the front attachment hub, whereas the bowl is a separate component of the mixer. Keeping those two compatibility questions separate can prevent confusion.
Need the Correct Dough Hook?
If you are preparing pasta dough and need to identify the correct mixing accessory before using the pasta roller, see:
Which Dough Hook Fits My KitchenAid Mixer?
This can help you identify the appropriate dough hook before moving from dough preparation to rolling.
Need the Correct Flat Beater?
For general KitchenAid mixer accessory identification:
Which Flat Beater Fits My KitchenAid Mixer?
This is particularly useful if you are trying to identify a replacement beater or determine which beater configuration belongs to your mixer.
KitchenAid Pasta Attachment Resources
For readers who want to stay specifically within the pasta-attachment topic, these are the most relevant parts of this guide:
- KSMPSA compatibility — identifies which KitchenAid mixers the roller is designed to fit.
- KSMPSA vs. KSMPRA — explains the difference between a roller-only configuration and a roller-and-cutter set.
- What Is Included? — identifies the components supplied with different pasta-attachment configurations.
- Pasta roller settings — explains what the eight roller positions do.
- Pasta roller troubleshooting — helps diagnose installation, dough and operating problems.
- Which Pasta Setup Do You Need? — helps determine whether you need a roller, individual cutter or complete set.
Build Your Compatibility Path
If you are unsure where to start, use this sequence:
1. Identify your mixer
→ Find your KitchenAid model number
2. Identify the attachment
→ Check the model number on the attachment or its packaging.
3. Verify compatibility
→ Use the KitchenAid attachment compatibility guide
4. Check the package contents
→ Compare the attachment model with the manufacturer’s component chart.
5. Identify the component you actually need
→ Roller, spaghetti cutter, fettuccine cutter or another compatible accessory.
This creates a useful internal-link path without forcing readers to leave the page simply because they have a different KitchenAid compatibility question.
Last Updated on September 21, 2026 by Susan Joy