
Last Updated on September 24, 2026 by Susan Joy
Which KitchenAid pasta roller fits your mixer depends less on the mixer’s appearance and more on the attachment connection and the exact pasta accessory you are buying. The KitchenAid KSMPSA pasta roller connects through the stand mixer’s front attachment hub and is currently listed by KitchenAid as fitting all household KitchenAid stand mixers.
The important distinction is that a pasta roller and a pasta cutter do different jobs. The KSMPSA rolls pasta dough into sheets; cutters are used afterward when you want shapes such as spaghetti or fettuccine. KitchenAid sells the KSMPSA as a standalone roller, while other pasta packages include additional cutters.
Does the KitchenAid KSMPSA Fit Your Mixer?
KitchenAid says the KSMPSA fits all household KitchenAid stand mixers. It attaches to the front power hub and uses the mixer as its power source.
There Are Three Things to Check Before Buying
Your KitchenAid Mixer
Start with the exact mixer you own. For the KSMPSA, KitchenAid currently states that the roller fits all household KitchenAid stand mixers.
The Attachment Hub
The pasta roller connects to the front attachment hub of the stand mixer. This is different from accessories such as beaters and dough hooks that work inside the bowl.
What You Want to Make
The KSMPSA makes pasta sheets. If you want cut noodles such as spaghetti or fettuccine, you also need the appropriate pasta cutter.
In this article, we’ll cover:
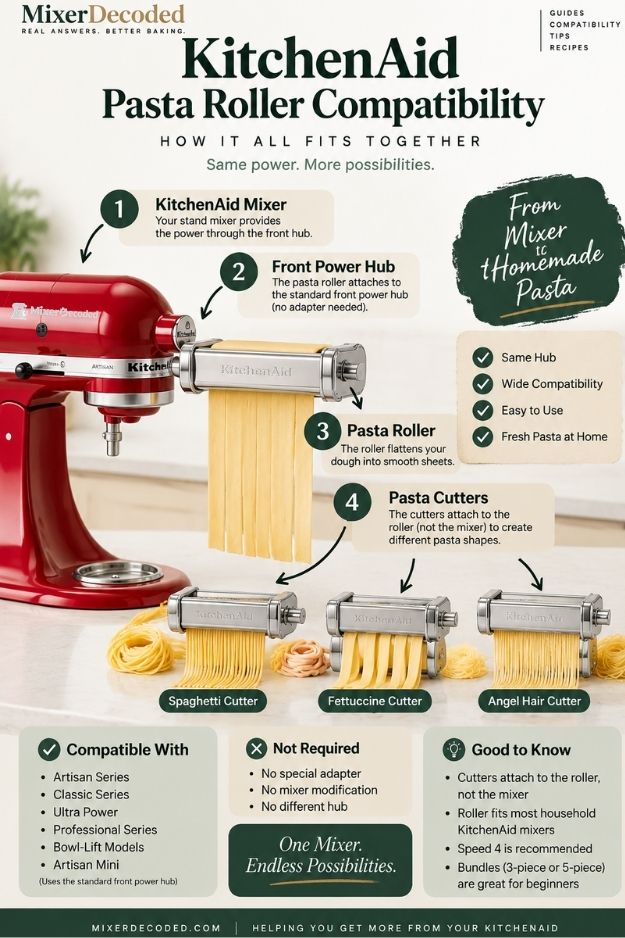
KitchenAid Pasta Roller Compatibility at a Glance
Before choosing a KitchenAid pasta attachment, it helps to separate three questions: whether the roller fits your mixer, what the KSMPSA actually does, and how the roller fits into the complete pasta-making system.
Quick Compatibility Check
The KitchenAid KSMPSA pasta roller is designed to connect to the front attachment hub of a KitchenAid stand mixer. KitchenAid currently states that the KSMPSA fits all household KitchenAid stand mixers.
What the KSMPSA Actually Does
The KSMPSA is the sheet roller in the KitchenAid pasta system. Its job is to take prepared pasta dough and progressively roll it thinner into a flat sheet. It does not cut that sheet into spaghetti, fettuccine, or other noodle shapes.
Prepared pasta dough enters the roller.
The rollers flatten and thin the dough.
The roller provides eight thickness settings.
A compatible cutter can be used afterward to create noodles.
The Simplest Way to Think About the System
Think of the KitchenAid pasta setup as a simple sequence rather than as one single attachment. The mixer supplies the power, the attachment hub connects the accessory, the KSMPSA creates the pasta sheet, and a cutter can be added when you want a specific noodle shape.
Mixer → Attachment Hub → KSMPSA Roller → Pasta Sheet → Optional Cutter
Once you understand this sequence, it becomes much easier to determine which KitchenAid pasta attachment you actually need.The KSMPSA is the rolling stage of the KitchenAid pasta system. It fits all household KitchenAid stand mixers according to KitchenAid’s current product information, connects through the front attachment hub, produces pasta sheets, and can be followed by a compatible cutter when you want spaghetti or fettuccine.
KitchenAid KSMPSA Pasta Roller Specifications
The KitchenAid KSMPSA is the standalone pasta sheet roller in KitchenAid’s pasta attachment lineup. It connects to the front attachment hub of a household KitchenAid stand mixer and uses the mixer’s power to roll prepared pasta dough into sheets.
KSMPSA Specifications at a Glance
These are the core specifications that matter when you’re checking what the KSMPSA is, how it connects, and what it can produce.
What the Eight Thickness Settings Mean
The numbered settings control how thin the pasta sheet becomes as it passes through the roller. KitchenAid’s pasta roller guidance uses the settings progressively, starting with thicker dough and moving toward thinner sheets.
Used for working and beginning to thin the pasta dough.
Suitable for thicker pasta such as kluski-style noodles.
A useful setting for thicker egg-noodle-style pasta.
These settings cover several common pasta preparations according to KitchenAid’s roller guidance.
Useful for tortellini, thin fettuccine and linguine-style sheets.
Intended for very thin preparations such as angel hair, capellini-style pasta and fine linguine.
What Comes With the KSMPSA?
The KSMPSA is sold as a standalone pasta roller rather than as a complete multi-cutter pasta set. Knowing what is actually included prevents you from assuming that every KitchenAid pasta accessory comes in the same package.
KSMPSA vs. a Complete Pasta Set
The biggest difference is not mixer compatibility. It is what each package gives you. The KSMPSA focuses on rolling pasta sheets, while a complete pasta package can combine the roller with cutters for different noodle shapes.
| Feature | KSMPSA | Complete Pasta Set |
|---|---|---|
| Pasta roller | ✓ Included | ✓ Included |
| Spaghetti cutter | — Separate accessory | Depends on the package |
| Fettuccine cutter | — Separate accessory | Depends on the package |
| Cleaning brush | ✓ Included | Depends on the package |
| Best suited for | Rolling pasta sheets | Rolling and cutting pasta |
Choose the KSMPSA if you primarily need a pasta roller and want to add cutters separately when necessary.
Choose a complete pasta set if you want the roller and multiple cutters together in one package.
The KSMPSA is a standalone KitchenAid pasta sheet roller with eight thickness settings, a 6-inch sheet width, a stainless-steel roller and an included cleaning brush. Its main limitation compared with a complete pasta set is simple: cutters for finished noodle shapes are additional accessories rather than part of the standalone roller.
How the KitchenAid Pasta Roller Connects to Your Mixer
KitchenAid Pasta Roller vs. Pasta Cutter: What Is the Difference?
A KitchenAid pasta roller and a pasta cutter perform two different jobs in the pasta-making process. The roller turns pasta dough into a smooth, flat sheet, while the cutter turns that sheet into specific noodle shapes.
Understanding this difference is important when choosing KitchenAid pasta attachments because a roller and a cutter are not interchangeable. They are designed to handle different stages of the same process.
Roller vs. Cutter at a Glance
| Feature | Pasta Roller | Pasta Cutter |
|---|---|---|
| Primary job | Flattens and thins pasta dough | Cuts a prepared pasta sheet into noodles |
| Used on | Pasta dough | Rolled pasta sheet |
| Main result | Flat pasta sheet | Noodle strands |
| Controls | Sheet thickness | Noodle width and shape |
| Can be used alone? | Yes. The sheet can be used for several pasta dishes. | It needs a suitable pasta sheet to cut. |
How the Two Stages Work Together
The easiest way to understand the two attachments is to think of them as consecutive stages rather than competing attachments.
Start with properly prepared pasta dough that can be flattened and passed through the roller.
The pasta roller gradually reduces the dough into a thinner, more uniform sheet.
The finished sheet can be used as a sheet for dishes such as lasagna or ravioli, or it can be prepared for cutting.
A compatible pasta cutter can then turn the sheet into the particular noodle shape that cutter is designed to produce.
What Does a KitchenAid Pasta Roller Actually Do?
Rolling and thinning the dough
The roller takes a portion of prepared pasta dough and gradually flattens it into a pasta sheet. KitchenAid’s pasta roller provides multiple thickness settings, allowing the sheet to become progressively thinner.
- Creates a consistent pasta sheet
- Controls the thickness of the sheet
- Provides the starting material for many cut-pasta shapes
- Can also produce sheets that do not need to be passed through a cutter
What Does a KitchenAid Pasta Cutter Actually Do?
Turning the sheet into noodles
A pasta cutter takes a prepared pasta sheet and cuts it into strands according to the cutter’s design. Different cutters produce different noodle widths or shapes.
- Works with an already-rolled pasta sheet
- Produces a specific noodle shape
- Does not replace the dough-thinning function of the roller
- Allows the same basic pasta sheet to be transformed into different noodle styles when compatible cutters are available
Why You May Need Both
If your goal is to make long, uniform noodles with a KitchenAid stand mixer, the roller and cutter serve complementary purposes.
The dough must first be flattened to the appropriate thickness before it can be turned into a cut noodle.
Once the sheet has reached the desired thickness, the appropriate cutter can divide it into its intended noodle shape.
What Can You Make With the Roller Without a Cutter?
A pasta cutter is not required for every use of a pasta roller. Once the dough has been rolled into a suitable sheet, that sheet can be used directly for preparations that call for flat pasta.
Use the rolled pasta sheet as the flat pasta layer rather than cutting it into long strands.
Rolled sheets can be cut or shaped separately for filled pasta.
A sheet can also be cut manually when you do not need a dedicated machine cutter.
The Simple Way to Think About Roller vs. Cutter
It determines how thick or thin your pasta sheet becomes.
It determines the noodle form produced from the prepared sheet.
The roller prepares the sheet and the cutter transforms that sheet into noodles.
A KitchenAid pasta roller and pasta cutter are complementary attachments, not alternatives. The roller flattens and controls the thickness of the dough, while the cutter turns the finished sheet into a particular noodle shape. Which KitchenAid model combines these functions is a separate buying question—and that is where the KSMPSA vs. KSMPRA comparison becomes important.
KSMPSA vs. KSMPRA: What’s the Difference?
The KitchenAid KSMPSA and KSMPRA are both designed around the same basic pasta-rolling system, but they are packaged differently. The KSMPSA is the standalone pasta roller, while the KSMPRA is a three-piece roller-and-cutter set.
That means the main difference is not whether one can roll pasta and the other cannot. The important difference is which pasta attachments you receive in the package.
KSMPSA vs. KSMPRA at a Glance
| Feature | KSMPSA | KSMPRA |
|---|---|---|
| Product type | Pasta Roller | 3-Piece Pasta Roller & Cutter Set |
| Pasta roller | Included | Included |
| Spaghetti cutter | Not included | Included |
| Fettuccine cutter | Not included | Included |
| Cleaning brush | Included | Included |
| Roller width | 6-inch pasta sheets | 6-inch pasta sheets |
| Roller settings | 8 thickness settings | 8 thickness settings |
What Is the KSMPSA?
KSMPSA Pasta Roller
The KSMPSA is KitchenAid’s standalone pasta roller attachment. It is designed to roll fresh pasta dough into 6-inch sheets and provides 8 thickness settings.
What Is the KSMPRA?
3-Piece Pasta Roller & Cutter Set
The KSMPRA packages the pasta roller together with two dedicated noodle cutters. KitchenAid lists the included attachments as a pasta roller, spaghetti cutter, fettuccine cutter, and cleaning brush.
What Is the Same Between KSMPSA and KSMPRA?
The two models should not be treated as completely different pasta systems. The KSMPRA includes the same basic rolling function represented by the KSMPSA, then adds two cutters to the package.
The roller is the part used to create the pasta sheet.
The rolling stage provides multiple thickness positions for preparing the pasta sheet.
The roller is designed around the same sheet width.
The attachments use the stand mixer’s attachment hub rather than a separate motor.
What Is Actually Different?
The package centers on the pasta roller. If you want spaghetti or fettuccine made with a dedicated KitchenAid cutter, those cutters must be obtained separately.
The package includes the roller plus dedicated spaghetti and fettuccine cutters, so those two cutting stages are already covered.
How the Choice Changes Your Setup
Build Your Setup
Start with the roller and add only the cutters you actually want. This keeps the attachment configuration focused on your particular pasta-making needs.
Ready-Made Combination
The roller, spaghetti cutter, and fettuccine cutter are packaged together, giving you those three attachments without assembling the set separately.
Which One Matches Your Pasta Setup?
| If your main goal is… | Relevant setup |
|---|---|
| Rolling pasta sheets | KSMPSA or KSMPRA |
| Making lasagna or other flat-sheet pasta | KSMPSA or KSMPRA |
| Making spaghetti with an included cutter | KSMPRA |
| Making fettuccine with an included cutter | KSMPRA |
| Choosing your cutters separately | KSMPSA as the roller-only starting point |
The Practical Difference in One Sentence
Buy the roller separately when the roller is the main attachment you need and you want flexibility to add other cutters.
Choose the three-piece set when you want the roller, spaghetti cutter, and fettuccine cutter together.
The main difference between KSMPSA and KSMPRA is the package configuration. Both provide the pasta-rolling function, but KSMPRA adds dedicated spaghetti and fettuccine cutters. The right comparison therefore comes down to the attachments you actually need, not simply which model number looks newer or more complete.
What Is Included With KitchenAid Pasta Attachments?
KitchenAid pasta attachments are sold in different configurations, so the model number matters when you want to know exactly what is included. A package may contain only the pasta roller, while another may combine the roller with one or more pasta cutters.
The easiest way to avoid confusion is to separate three things: what the box contains, what the attachment is compatible with, and what additional accessories can be added later.
KSMPSA: What’s in the Box?
KSMPSA
| Component | Included? | Purpose |
|---|---|---|
| Pasta Roller | YES | Rolls pasta dough into sheets. |
| Cleaning Brush | YES | Helps remove dried dough from the attachment. |
| Spaghetti Cutter | NO | Not included with the KSMPSA. |
| Fettuccine Cutter | NO | Not included with the KSMPSA. |
| Other Pasta Cutters | NO | Not part of the standard KSMPSA package. |
KSMPRA: What’s in the Box?
KSMPRA
| Component | Included? | Purpose |
|---|---|---|
| Pasta Roller | YES | Rolls pasta dough into sheets. |
| Spaghetti Cutter | YES | Cuts prepared pasta sheets into spaghetti. |
| Fettuccine Cutter | YES | Cuts prepared pasta sheets into fettuccine. |
| Cleaning Brush | YES | Helps remove dried dough from the attachments. |
| Capellini Cutter | NO | Not included in the standard KSMPRA set. |
| Lasagnette Cutter | NO | Not included in the standard KSMPRA set. |
Other KitchenAid Pasta Attachment Configurations
KSMPSA and KSMPRA are not the only configurations in KitchenAid’s pasta attachment family. KitchenAid’s accessory chart identifies several model combinations, each containing a different selection of rollers and cutters.
| Model | Included attachment configuration |
|---|---|
| KSMPSA | Pasta roller |
| KSMPRA | Pasta roller + spaghetti cutter + fettuccine cutter |
| KSMPCA | Capellini cutter + lasagnette cutter |
| KSMFETPRA | Pasta roller + fettuccine cutter |
| KSMPDX | Pasta roller + spaghetti cutter + fettuccine cutter + capellini cutter + lasagnette cutter |
Don’t Confuse “Included” With “Compatible”
This describes the attachments and accessories supplied as part of that particular package.
This describes whether a particular attachment can be used with the relevant KitchenAid stand mixer or attachment system.
A cutter can be compatible with your mixer without being included in the package you purchased.
Why the Cleaning Brush Matters
KitchenAid lists the cleaning brush among the included accessories for the KSMPSA and KSMPRA packages.
KitchenAid’s cleaning guidance recommends allowing the attachment to air dry and then removing dried dough with the included brush.
KitchenAid’s care instructions say not to immerse the pasta attachment or put it in the dishwasher.
A Simple Way to Check Your Existing Setup
Check the attachment, packaging, documentation, or product information for the model designation.
Determine whether you have a roller, spaghetti cutter, fettuccine cutter, or another cutter.
Match what you physically have against the model’s documented included components.
This helps prevent buying a second roller when what you actually need is a specific cutter.
Before Ordering a Replacement or Additional Attachment
Do not rely only on the appearance of the attachment.
Determine whether you need a roller, spaghetti cutter, fettuccine cutter, or another specific accessory.
KitchenAid’s accessory charts can help identify which components belong to each documented model configuration.
When identifying a KitchenAid pasta attachment, start with the model number, then check the documented contents of that model. KSMPSA is the roller-focused configuration, while KSMPRA includes the roller, spaghetti cutter, fettuccine cutter, and cleaning brush. Other KitchenAid models combine different cutters and rollers, so the model number is more reliable than appearance alone.
How to Find Your KitchenAid Mixer Model Number
If you are checking whether a KitchenAid pasta roller is compatible with your mixer, knowing the exact mixer model number can remove uncertainty—especially if you have an older, discontinued, or less familiar KitchenAid model.
Locate the Model Label
KitchenAid places model information in different locations depending on the mixer design. Look for the manufacturer’s identification label or tag on the mixer body and check the information printed on it.
Record the Complete Model Number
Write down the complete model number rather than relying only on the mixer’s appearance, series name, or bowl size. The full model number provides a more precise way to identify the mixer.
Use It to Confirm Compatibility
Once you have the model number, you can compare it with the compatibility information for the pasta roller or other KitchenAid attachment you are considering.
For the KSMPSA specifically, KitchenAid states that the pasta roller fits all household KitchenAid stand mixers. The model number is therefore most useful when you want to verify an unusual, older, or less clearly identified mixer before buying an attachment.
How to Find Your KitchenAid Mixer Model Number
Our dedicated guide explains where to look for the model number and how to identify it correctly across different KitchenAid mixer designs.
Read the complete KitchenAid model-number guide →How to Attach the KitchenAid Pasta Roller to Your Mixer
The KitchenAid pasta roller connects through the stand mixer’s front attachment hub. Installation is straightforward, but the attachment must be properly aligned with the square hub socket and secured with the attachment hub knob before you use it.
Before you install the pasta roller
Have the mixer and pasta roller positioned so you can work directly in front of the attachment hub. The mixer should be switched off and unplugged, and the bowl can be removed to give you easier access to the hub area.
Depending on the mixer design, the attachment hub may have a removable cover or a hinged cover. Open or remove the cover before inserting the pasta roller.
Mixer is switched OFF
Mixer is unplugged
Attachment hub cover is open or removed
Pasta roller shaft and hub opening are accessible
Step-by-step installation
Make sure the speed control is off before working with the attachment hub.
Remove the hub cover on models with a removable cover. On models with a hinged cover, flip the cover up to expose the hub.
Slide the attachment shaft housing into the mixer’s attachment hub. The roller’s power shaft needs to engage the square socket inside the hub.
If the shaft does not immediately engage, gently rotate the pasta roller back and forth while applying light insertion pressure. Do not force the attachment.
When the roller is correctly positioned, the pin on the attachment housing fits into the notch on the rim of the attachment hub.
Turn the hub knob clockwise until the pasta roller is completely secured to the mixer. The attachment should feel firmly held in position before operation.
The important connection is not simply that the roller appears to be sitting inside the hub. The power shaft must engage the square socket and the locating pin must sit in the hub-rim notch. The hub knob then secures the attachment in that position.
What a properly installed roller should look like
Once installed, the pasta roller should sit firmly in the front attachment hub without appearing loose or partially engaged. Use the points below as a quick visual and mechanical check before turning the mixer on.
| What to check | What you should see or feel |
|---|---|
| Power shaft | The shaft is engaged with the square socket inside the attachment hub. |
| Locating pin | The pin on the attachment housing is seated in the notch on the hub rim. |
| Hub knob | The attachment hub knob is tightened and the roller is held securely. |
| Attachment position | The roller is seated straight and does not appear partially inserted. |
| Overall fit | The attachment does not wobble loosely at the hub when properly secured. |
If the Pasta Roller Won’t Slide Into the Hub
Do not force the roller into the attachment hub. The most common issue is that the power shaft is not aligned with the square socket.
Confirm that the attachment hub cover has been completely opened or removed.
Reposition the roller so its power shaft lines up with the square socket.
Gently rotate the roller back and forth while attempting to seat the shaft.
Once the shaft engages, check that the locating pin can sit in the hub-rim notch.
Tighten the hub knob only after the attachment is properly seated.
Do not force it. If the shaft will not engage after repositioning the roller, stop and verify that you have the correct attachment and that the hub is unobstructed.
If the Roller Is Installed but Does Not Turn
If the roller physically fits but does not rotate when the mixer is running, check the connection before assuming the attachment itself is defective.
Make sure the power shaft is actually engaged with the square hub socket.
Confirm that the pin is seated in the notch on the hub rim.
Make sure the attachment hub knob has been tightened enough to secure the roller.
Confirm that the mixer itself is powered and operating normally before diagnosing the roller.
KitchenAid’s current troubleshooting guidance also recommends checking that the attachment is fully engaged with the hub socket and that the hub knob is tightened.
Do Not Use the Attachment for Other Materials
The KitchenAid pasta roller is designed for pasta dough. It should not be treated as a general-purpose sheet roller for unrelated foods or materials.
How to Remove the Pasta Roller
Removing the roller is essentially the reverse of installation, but the mixer should always be switched off and unplugged first.
- Turn the stand mixer off and unplug it.
- Loosen the attachment hub knob.
- Remove the pasta roller from the attachment hub.
- Replace the hub cover.
- Tighten the attachment knob to secure the hub cover.
KitchenAid’s pasta sheet roller removal instructions follow this same sequence and specifically advise replacing the hub cover and tightening the attachment knob after the roller is removed.
Quick Installation Checklist
Mixer is OFF and unplugged.
Attachment hub cover is open or removed.
Power shaft is engaged with the square hub socket.
Locating pin is seated in the hub-rim notch.
Attachment hub knob is tightened securely.
Roller is firmly seated before operation.
KitchenAid Pasta Roller Settings: What Does Each Number Mean?
The KitchenAid pasta roller has eight thickness settings. The key thing to remember is that the numbers work in the opposite direction from what you might expect: setting 1 is the thickest starting point, while higher numbers produce progressively thinner pasta sheets.
KitchenAid Pasta Roller Settings Chart
KitchenAid’s published roller guide connects each setting or setting range with different types of pasta. These are useful starting points rather than measurements that every recipe must follow exactly.
| Roller Setting | Thickness Direction | Suggested Uses |
|---|---|---|
| 1–2 | Thickest / initial thinning | Kneading and thinning dough |
| 3 | Thick | Thick “kluski”-type noodles |
| 4 | Medium | Egg noodles |
| 4–5 | Medium-thin | Lasagna, fettuccine, spaghetti and ravioli |
| 6–7 | Thin | Tortellini, thin fettuccine and linguine fini |
| 7–8 | Very thin | Angel-hair-type pasta, capellini and very fine linguine |
Setting 1: Start Here
Setting 1 is the starting point for rolling pasta dough. At this position, the rollers are at their widest opening, making it suitable for beginning the kneading and thinning process.
Flatten the dough enough to enter the rollers and feed it through at setting 1. During the initial passes, folding the dough helps develop a smoother, more workable sheet. KitchenAid’s instructions recommend continuing this process until the dough becomes smooth and pliable and reaches approximately the width of the roller.
Setting 2: Continue Thinning
Setting 2 narrows the rollers slightly and continues flattening the dough after the initial work at setting 1.
Once the dough has become smooth and pliable, pass it through setting 2 to continue reducing its thickness. From this point onward, you normally move progressively upward through the settings rather than repeatedly folding the sheet.
Setting 3: Thick Pasta
Setting 3 produces a relatively thick pasta sheet. KitchenAid specifically lists this setting for thick “kluski”-type noodles.
It can also serve as an intermediate stage when you are continuing toward a thinner finished sheet. You do not have to stop at setting 3 simply because the dough has reached this number.
Setting 4: Egg Noodles
Setting 4 is the manufacturer’s suggested setting for egg noodles and is also an important middle point in the rolling process.
If your recipe calls for a thinner sheet, continue beyond setting 4 rather than treating it as a universal stopping point.
Settings 4–5: Lasagna, Fettuccine, Spaghetti and Ravioli
KitchenAid lists settings 4 or 5 for several familiar pasta preparations, including lasagna, fettuccine, spaghetti and ravioli.
The correct stopping point can still depend on the particular pasta you are making. For example, KitchenAid’s ravioli guidance recommends setting 4 or 5 for sheets used with its ravioli maker, because rolling the dough thinner can increase the chance of the filled pockets tearing.
Settings 6–7: Thin Pasta
Settings 6 and 7 move into thinner pasta-sheet territory. KitchenAid lists tortellini, thin fettuccine and linguine fini among the suggested uses for this range.
At these settings, the sheet is considerably thinner than it was at the earlier stages, so handle it more carefully and use only enough flour to prevent sticking.
Settings 7–8: Very Thin Pasta
Settings 7 and 8 are intended for very thin pasta. KitchenAid lists angel-hair-type pasta, capellini and very fine linguine among the suggested uses.
Setting 8 is therefore not simply “another step” that every batch needs to reach. It is the thinnest end of the roller’s range and should be used when the pasta you are making calls for a particularly delicate sheet.
Does a Higher Number Mean Thicker Pasta?
No. This is one of the easiest KitchenAid pasta roller details to get backwards.
In other words, the higher the setting number, the thinner the sheet. If you want thicker pasta, use a lower number.
What Speed Should the Mixer Be On?
The roller setting and the mixer speed are two different controls. The roller number determines the thickness of the sheet, while the mixer speed controls how quickly the dough passes through the attachment.
| KitchenAid documentation | What it says |
|---|---|
| Pasta Sheet Roller guidance | Speed 2 is listed for the pasta roller in KitchenAid’s speed chart. |
| Pasta sheet procedure | KitchenAid also has a current procedure that states Speed 2 or 4 for the roller. |
| Newer 3-in-1 Pasta Attachment | KitchenAid’s separate 3-in-1 documentation specifies Speed 4 for rolling and cutting. |
How to Progress Through the Settings
The normal progression is to begin at the widest setting and move upward one setting at a time as the sheet becomes thinner.
Knead and begin thinning
Flatten and develop the sheet
Common everyday pasta thicknesses
Delicate pasta sheets
KitchenAid’s instructions specifically recommend increasing the roller setting as you continue until the desired thickness is reached. You do not need to run every dough through all eight settings.
How Many Passes Should the Dough Make?
There is no single number of passes that applies to every batch. The initial passes at setting 1 are different from the later thickness-setting passes.
During the initial stage, KitchenAid recommends folding and rerolling the dough several times until it becomes smooth, pliable and wide enough to cover the roller. After that, the dough is progressively passed through higher settings without folding it during the thinning stage.
Several passes at setting 1, folding between passes as the dough is kneaded and developed.
Move through settings 2, 3 and onward, feeding the sheet through until the desired thickness is reached.
Some KitchenAid recipes give exact pass counts for a particular dough or finished pasta. Those recipe-specific instructions should take priority over a generic pass count.
Flour the Dough Lightly When Necessary
A light dusting of flour can help prevent the pasta from sticking to the rollers as the dough becomes thinner. KitchenAid repeatedly recommends lightly dusting pasta while rolling.
If the dough is sticking badly, also consider whether the dough itself is too wet. KitchenAid’s troubleshooting guidance recommends adding flour when the dough is too wet and sticking to the roller.
Which Setting Should You Use for Your Pasta?
Start with the manufacturer’s suggested range, then choose the final setting based on the type of pasta you are preparing and how the sheet handles.
| If you’re making… | Start with this KitchenAid range |
|---|---|
| Thick kluski-style noodles | 3 |
| Egg noodles | 4 |
| Lasagna | 4–5 |
| Fettuccine | 4–5 |
| Spaghetti | 4–5 |
| Ravioli | 4–5 |
| Tortellini / thin fettuccine / linguine fini | 6–7 |
| Angel hair / capellini / very fine linguine | 7–8 |
These are KitchenAid’s suggested settings, not mandatory rules for every recipe. Dough formulation, filling requirements and the pasta shape can affect the thickness that works best.
The Most Important Setting Rule
Setting 1 is the widest and thickest position. Increase the number as you want a thinner sheet.
You do not need to reach setting 8 unless the pasta you are making calls for a very thin sheet.
The roller number controls thickness. The mixer speed is a separate operating instruction and should follow the guidance for your specific KitchenAid attachment.
What Speed Should You Use With the KitchenAid Pasta Roller?
The KitchenAid pasta roller’s roller setting and the mixer’s speed setting do two different jobs. The roller number controls how thin the pasta sheet becomes, while the mixer speed controls how quickly the dough moves through the attachment.
Mixer Speed vs. Roller Setting
It is easy to confuse these two controls because both are part of the pasta-rolling process. They should be treated separately.
| Control | What it controls | What happens as you change it |
|---|---|---|
| Mixer speed | How quickly the powered roller turns and feeds the dough. | A higher mixer speed makes the attachment operate faster. |
| Roller setting | The thickness of the pasta sheet. | Moving from 1 toward 8 progressively reduces the sheet thickness. |
| Dough condition | How easily the dough passes through the rollers. | Dough that is too wet, dry, or poorly prepared can affect the rolling process. |
Why You May See Speed 2 in Older KitchenAid Instructions
If you search for KitchenAid pasta roller instructions, you may find Speed 2 recommended repeatedly. That is not accidental. KitchenAid’s traditional pasta roller documentation and its owner documentation specify Speed 2 for the pasta roller.
KitchenAid’s current pasta-making guidance also continues to show Speed 2 for the traditional pasta roller. Its pasta-making page instructs users to turn the mixer to Speed 2 before feeding dough into the rollers.
KitchenAid’s pasta roller speed chart lists Speed 2 for the pasta roller.
KitchenAid’s separate 3-in-1 attachment documentation specifies Speed 4 for rolling and cutting.
There is also a current KitchenAid pasta-sheet procedure that says the traditional roller can be operated at Speed 2 or 4. Because KitchenAid’s own pages are not completely uniform on this point, the safest approach is to identify the attachment you have and follow the instructions associated with that attachment and documentation.
A Simple Speed-and-Setting Workflow
For the traditional KSMPSA-style pasta roller, the practical workflow is simple: choose the appropriate mixer speed for your attachment, then use the roller settings to control the thickness.
-
Identify the attachment.
Confirm whether you are using the traditional KSMPSA pasta roller or the newer 3-in-1 attachment.
-
Set the roller to 1.
Setting 1 is the thickest position and is used to begin kneading and thinning the dough.
-
Set the mixer to the speed specified for your attachment.
For the traditional pasta roller, KitchenAid’s standard guidance is Speed 2. The newer 3-in-1 documentation specifies Speed 4.
-
Feed the dough through setting 1.
During the initial stage, fold and reroll the dough as directed until it becomes smooth, pliable and wide enough for the roller.
-
Increase the roller setting.
Move from setting 1 toward 2, 3 and higher settings as you progressively thin the sheet. Do not confuse this number with the mixer speed.
-
Stop at the thickness your pasta requires.
You do not need to take every sheet all the way to setting 8.
What If the Attachment Does Not Turn?
If the pasta roller is installed but the rollers do not turn, do not immediately assume that the attachment is defective. First check the basic drive connection.
Confirm that the stand mixer is plugged in and operating normally.
The power shaft must be fully engaged with the square socket inside the hub.
The pin on the attachment housing should sit in the notch on the hub rim.
Make sure the attachment hub knob is tightened and the roller is securely held.
Make sure you are following the speed guidance for the specific attachment you are using.
KitchenAid’s troubleshooting guidance for its pasta attachments specifically recommends checking the mixer power, correct speed, attachment engagement, square hub socket, locating pin and hub knob when an attachment does not work.
The Rule to Remember
KitchenAid’s pasta roller speed chart and traditional pasta instructions specify Speed 2.
Start at 1 and increase the roller setting as you want progressively thinner pasta sheets.
KitchenAid’s newer 3-in-1 attachment has its own Speed 4 instructions, so the attachment model matters.
This avoids treating different generations or attachment designs as though they were the same product.
KitchenAid Pasta Roller Troubleshooting
When a KitchenAid pasta roller does not work as expected, the problem is not necessarily the attachment itself. Dough consistency, roller thickness, mixer speed, attachment installation, and the mixer can all affect how the roller behaves.
The fastest way to diagnose a problem is to identify the symptom first, then determine whether it points to the dough, the attachment, or the mixer.
KitchenAid Pasta Roller Troubleshooting Chart
| Problem | Likely Cause | First Thing to Check |
|---|---|---|
| Roller is not turning | Incorrect speed, poor hub engagement, dough resistance, or attachment issue | Check the hub connection, mixer speed, and dough before assuming the roller has failed |
| Dough sticks to the roller | Dough is too wet or insufficiently floured | Lightly flour the dough and check its consistency |
| Pasta sheet tears or develops holes | Sheet may be too thin or dough may be too dry | Return to a thicker setting and inspect the dough |
| Dough is dry and crumbly | Insufficient moisture | Add liquid gradually according to the dough recipe |
| Dough keeps springing back | Dough has not rested sufficiently and gluten remains tight | Let the dough rest before continuing to roll |
| Pasta sheet is uneven | Uneven feeding, dough preparation, or insufficient initial passes | Start thicker and work the dough until it becomes smooth and even |
| Mixer stops while rolling | Overload, overheating, speed, installation, or another mixer issue | Turn it off, unplug it, check the setup, and allow it to cool |
| Roller is difficult to turn | Dough resistance, attachment condition, or mechanical issue | Check the dough first, then test the roller without dough |
| Attachment is loose in the hub | Power shaft, locating pin, or hub knob is not correctly engaged | Remove and reinstall the attachment correctly |
The Pasta Roller Is Not Turning
If the mixer is running but the pasta roller is not turning, do not immediately assume that the roller is defective. KitchenAid’s troubleshooting guidance starts with the same basic checks: power, correct speed, and proper attachment installation.
- Turn the mixer OFF and unplug it.
- Remove and reinstall the pasta roller in the front attachment hub.
- Make sure the power shaft is engaged with the square hub socket.
- Make sure the locating pin sits in the notch on the hub rim.
- Tighten the attachment hub knob securely.
- Confirm that the mixer is connected to a working outlet.
- Restart the mixer using an appropriate speed for the attachment.
If the roller still does not turn after the hub connection, speed, and dough have been checked, stop forcing the attachment. Persistent failure may indicate an attachment or mixer problem requiring service.
The Dough Is Sticking to the Roller
Sticky pasta dough is usually a dough-consistency issue rather than a compatibility issue. Proper pasta dough should hold together without being excessively sticky to the touch.
Lightly dust the dough with flour and continue rolling. If the dough remains excessively sticky, return it to the mixer and gradually incorporate more flour. KitchenAid’s pasta guidance specifically recommends adding flour when the dough is too wet.
The Pasta Sheet Is Tearing or Developing Holes
If the pasta sheet develops holes or tears while passing through the roller, first check the thickness setting. KitchenAid specifically identifies rolling pasta too thin as a cause of holes and tears.
- Move the roller back to a thicker setting.
- Feed the dough through again.
- Check whether the sheet becomes stronger and more uniform.
- If tearing continues, inspect the dough for excessive dryness.
The Dough Is Too Dry and Crumbly
Pasta dough that remains dry and crumbly is difficult to roll because it cannot form a cohesive sheet. KitchenAid’s current pasta-dough guidance recommends adding water gradually when dough is too dry and crumbly.
Add a small amount of water at a time rather than correcting the dough with a large amount all at once. The finished dough should hold together when pressed but should not become sticky.
The Dough Keeps Springing Back
Dough that repeatedly contracts after passing through the roller has likely not relaxed enough. KitchenAid’s current pasta guidance explains that resting allows gluten strands to relax; dough rolled immediately after kneading can resist stretching, snap back, tear, or produce uneven sheets.
Let the dough rest before continuing. Keep it covered while resting so the surface does not dry out.
The Pasta Sheet Is Uneven
An uneven pasta sheet is often caused by the dough entering the roller unevenly or by insufficient initial passes rather than a compatibility problem.
Begin with the thicker roller setting and work the dough until it becomes smooth, pliable, and wide enough to cover the roller. Once you begin thinning the sheet, progressively increase the roller setting without repeatedly folding the dough. This is consistent with KitchenAid’s pasta-rolling procedure.
The Mixer Stops While Using the Pasta Roller
A mixer that stops completely should be treated differently from a roller that stops while the mixer motor continues running.
- Move the mixer control to OFF.
- Unplug the mixer.
- Check that the pasta roller is properly seated in the hub.
- Check that the attachment is being used at an appropriate speed.
- Allow the mixer to rest before attempting another start.
KitchenAid’s current 3-in-1 pasta-attachment troubleshooting specifies Speed 4, checking the attachment’s engagement with the hub, and then turning the mixer off for 10–15 seconds before restarting. If it still does not start, KitchenAid recommends allowing the mixer to cool for about 30 minutes before trying again.
The Roller Is Difficult to Turn
If the roller becomes difficult to turn, determine whether the resistance occurs only when dough is being fed through or whether the attachment itself appears mechanically difficult to operate.
Start by checking the dough. KitchenAid identifies dough that is too wet as one possible cause when the pasta roller is not rolling properly.
If the roller remains difficult to operate without dough, do not force it. The attachment may require inspection or service.
The Attachment Is Loose in the Hub
A loose attachment can prevent the drive shaft from remaining properly engaged. Turn the mixer OFF and unplug it before correcting the installation.
- Remove the attachment from the hub.
- Reinsert the attachment shaft housing.
- Confirm that the power shaft enters the square hub socket.
- Rotate the attachment slightly back and forth if necessary to align it.
- Make sure the locating pin fits the notch on the hub rim.
- Tighten the attachment hub knob until the attachment is secure.
These are the same basic engagement points KitchenAid identifies for its pasta attachments: square socket, locating pin, and tightened hub knob.
How to Know Whether the Problem Is the Dough or the Attachment
This distinction can save a lot of unnecessary troubleshooting. Pasta that sticks, tears, springs back, or rolls unevenly does not automatically indicate a faulty attachment.
Signs Pointing to the Dough
- Dough is wet and sticky
- Dough is dry and crumbly
- Sheet tears when rolled too thin
- Dough repeatedly springs back
- Sheet improves after resting
- Sheet improves after correcting moisture
Signs Pointing to the Attachment
- Rollers do not turn while the mixer is operating
- Attachment will not remain secure in the hub
- Power shaft does not engage correctly
- Another attachment works but the pasta roller does not
- Unusual resistance occurs without dough
Signs Pointing to the Mixer
- Mixer repeatedly stops
- Mixer will not restart after cooling
- Multiple hub attachments behave incorrectly
- Motor operation sounds abnormal
- Persistent overheating occurs
KitchenAid’s attachment troubleshooting also recommends checking whether the attachment is correctly engaged and whether the mixer itself is operating before proceeding to service.
When Should You Stop Troubleshooting?
Basic troubleshooting is appropriate for dough consistency, roller settings, attachment seating, speed selection, and simple power checks. It should not become repeated attempts to operate an attachment that appears mechanically damaged or a mixer that is repeatedly stopping.
Stop using the attachment and seek appropriate service or support if:
- The roller remains stationary while the mixer is operating.
- The attachment cannot be securely installed in the hub.
- The mixer repeatedly stops and will not operate normally after cooling.
- There is persistent abnormal mechanical noise.
- The mixer becomes unusually hot.
- The problem occurs with multiple attachments.
- The attachment shows visible physical damage.
Quick Diagnostic Checklist
Turn the mixer OFF and unplug it. Do this before inspecting or reinstalling the attachment.
Check the dough. It should hold together without being excessively wet, sticky, dry, or crumbly.
Check the roller setting. If the sheet tears, move back to a thicker setting.
Check the hub. Confirm the square power shaft, locating pin, and hub knob are correctly engaged.
Check the mixer speed. The traditional Pasta Sheet Roller chart specifies Speed 2, while KitchenAid also documents Speed 2 or 4 in its current sheet-making procedure.
Use Speed 4 as a diagnostic comparison. After confirming proper installation, Speed 4 can help determine whether the roller behaves differently at the alternate speed documented by KitchenAid.
If the mixer stops, let it rest. KitchenAid’s pasta-attachment troubleshooting recommends an initial 10–15 second shutdown and, if necessary, approximately 30 minutes of cooling.
Compare another attachment. This can help determine whether the problem follows the pasta attachment or the mixer hub.
Stop if the fault appears mechanical. Persistent failure, abnormal noise, overheating, or a roller that remains stationary may require service.
Most KitchenAid pasta-roller problems can be narrowed down by separating dough problems from attachment problems and mixer problems. Check dough consistency when pasta sticks, tears, springs back, or rolls unevenly. Check installation and speed when the roller does not turn. If the mixer repeatedly stops or the attachment remains mechanically abnormal after these checks, stop troubleshooting and seek service.
What Can You Put Through a KitchenAid Pasta Roller?
A KitchenAid pasta roller is designed to turn prepared dough into smooth, evenly sized sheets. But what you can safely put through it depends on the specific attachment you own.
This distinction matters because the KSMPSA Pasta Roller has traditional instructions that specify pasta dough, while KitchenAid’s newer 3-in-1 Pasta Attachment is explicitly designed to handle a wider range of doughs, including dumpling wrappers, tortillas, pizza dough and other preparations.
What the KSMPSA Is Designed For
| Use | KSMPSA Guidance |
|---|---|
| Fresh pasta dough | Yes. This is the primary intended use of the KSMPSA. It produces smooth pasta sheets in eight thickness settings. |
| Lasagna sheets | Yes. The roller can produce sheets at the thickness needed for lasagna. |
| Ravioli sheets | Yes. The roller creates the flat pasta sheets used to form filled pasta. |
| Fettuccine or spaghetti dough | Yes, for the sheet stage. The KSMPSA creates the sheet that can then be passed through a compatible pasta cutter. |
| Dumpling wrappers | Not specified for the KSMPSA. KitchenAid’s traditional documentation says these attachments are designed for pasta dough only. |
| Tortillas, pizza dough or other non-pasta dough | Not specified for the KSMPSA. Do not assume the broader 3-in-1 guidance applies to this attachment. |
KitchenAid’s traditional Pasta Roller documentation specifically states that the attachment is designed for pasta dough only and warns against rolling anything other than pasta.
The KSMPSA itself is designed to produce 6-inch pasta sheets and provides eight thickness settings.
What About Dumpling Wrappers, Tortillas or Pizza Dough?
This is where many KitchenAid pasta-attachment discussions become confusing. The answer is different for the traditional KSMPSA and the newer 3-in-1 attachment.
Traditional Pasta Roller
KitchenAid’s traditional documentation says the pasta roller and cutters are designed for pasta dough only. Therefore, the KSMPSA should not be presented as officially intended for tortillas, pizza dough, dumpling wrappers or other non-pasta doughs.
Newer Pasta Attachment
KitchenAid explicitly states that its newer 3-in-1 attachment can also be used with dumpling wrappers, flour tortillas, phyllo dough, pizza dough, naan and roti, in addition to pasta dough.
KitchenAid’s current 3-in-1 documentation specifically lists dumpling wrappers, flour tortillas, phyllo dough, pizza dough, naan and roti among the additional doughs that attachment can handle.
KSMPSA vs. Newer 3-in-1 Attachments
| Feature | KSMPSA | Newer 3-in-1 Pasta Attachment |
|---|---|---|
| Primary purpose | Roll pasta dough into sheets | Roll and cut pasta, with broader dough applications |
| Pasta dough | Yes | Yes |
| Dumpling wrappers | Not specified for use | Yes |
| Flour tortillas | Not specified for use | Yes |
| Pizza dough | Not specified for use | Yes |
| Phyllo dough | Not specified for use | Yes |
| Naan / roti | Not specified for use | Yes |
| Roller settings | 8 | 8 |
| Roller role | Sheet-making stage | Sheet-making plus integrated cutting system |
KitchenAid’s current documentation distinguishes the traditional pasta roller from the newer 3-in-1 system not only by speed and design, but also by the types of dough the newer attachment is intended to handle.
What About Pasta Shapes?
The KSMPSA is a sheet roller, not a pasta-shape press. Its job is to take pasta dough and produce a flat sheet at the desired thickness.
That sheet can then be used in several ways. You can leave it as a sheet for lasagna, use it for ravioli or other filled pasta, cut it by hand, or pass it through a compatible KitchenAid pasta cutter.
Lasagna and other flat pasta applications.
Ravioli and similar filled pasta made from rolled sheets.
Cut sheets into strips or other shapes manually.
Use a compatible KitchenAid cutter for specific noodle widths.
KitchenAid’s own buying guidance describes the basic Pasta Roller as suitable for lasagna noodles and hand-cut or stuffed pastas, while cutter-equipped systems add specific noodle shapes such as spaghetti and fettuccine.
Does the Roller Setting Determine the Pasta Shape?
| What You Change | What It Controls | What It Does Not Control |
|---|---|---|
| Roller setting | Thickness of the pasta sheet | The final noodle shape by itself |
| Pasta cutter | Cut width and noodle type supported by that cutter | The initial thickness of the sheet |
| Hand cutting | The shape and width you cut yourself | The roller’s mechanical thickness setting |
The eight KSMPSA settings determine how thick or thin the sheet becomes. KitchenAid’s chart associates certain thickness ranges with uses such as lasagna, fettuccine, spaghetti, ravioli, tortellini and very thin pasta, but the roller itself does not transform the sheet into those shapes.
What Should You Put Through the Roller?
For the KSMPSA, stay within the manufacturer’s intended use: properly prepared pasta dough. KitchenAid describes good pasta dough as firm and leathery but pliable, and says it should not stick to your fingers or crumble apart.
Prepared Pasta Dough
Dough with the correct consistency, portioned appropriately and rested according to the recipe or KitchenAid procedure.
Start Thick
Begin at the thickest setting and progressively reduce sheet thickness as the dough becomes smooth and workable.
Your Pasta Result
Keep the sheet for lasagna or filled pasta, cut it by hand, or use a compatible cutter for a supported noodle shape.
KitchenAid’s traditional procedure starts the Pasta Sheet Roller at setting 1, repeatedly rolls the dough until it becomes smooth and elastic, then increases the setting progressively to reach the desired thickness.
A Practical Rule for Buyers
The KSMPSA is designed around the traditional sheet-rolling stage and can handle lasagna, ravioli and other applications that start with a flat pasta sheet.
Remember that the roller creates the sheet. You need a compatible cutter or a cutter-equipped package to turn that sheet into the corresponding noodle.
Check the exact attachment model before buying. KitchenAid explicitly gives broader dough guidance for the newer 3-in-1 attachment, but that guidance should not automatically be applied to the KSMPSA.
The KSMPSA is fundamentally a pasta-sheet roller. Its eight settings control sheet thickness, while cutters or hand-shaping determine the final pasta form. For non-pasta doughs such as tortillas, pizza dough or dumpling wrappers, the important question is not whether the dough can physically pass through a roller, but whether your specific KitchenAid attachment is documented for that use. The newer 3-in-1 attachment has broader published dough applications than the traditional KSMPSA.
Which KitchenAid Pasta Setup Do You Need?
The right KitchenAid pasta setup depends less on the mixer you own and more on what type of pasta you actually want to make. The pasta roller creates the sheet; cutters determine which ribbon or noodle shape you can produce from that sheet.
That means you do not necessarily need the largest pasta attachment set. If you mainly make lasagna sheets, a roller may be enough. If you want both spaghetti and fettuccine, you need a configuration that includes those cutters. If you want the broadest range of traditional rolled pasta shapes, a larger set such as the KSMPDX combines the roller with four different cutters.
Choose the Attachment Based on What You Want to Make
| What You Want to Make | Configuration to Look For |
|---|---|
| Lasagna sheets or flat pasta sheets | A pasta roller, such as the KSMPSA. |
| Spaghetti and fettuccine | A roller plus spaghetti and fettuccine cutters, such as the KSMPRA. |
| Capellini and lasagnette | A compatible roller plus the capellini and lasagnette cutters. The KSMPCA is the dedicated two-cutter configuration, while the KSMPDX includes these cutters together with the roller and other cutters. |
| A broad selection of traditional rolled pasta | The KSMPDX, which combines the roller with spaghetti, fettuccine, lasagnette, and capellini cutters. |
If You Only Need Pasta Sheets
Choose the roller
If your main goal is making flat pasta sheets for lasagna, ravioli, stuffed pasta, or pasta that you plan to cut by hand, you may not need a cutter at all.
The KSMPSA is the straightforward configuration for this type of setup because it contains the pasta roller without the spaghetti or fettuccine cutters.
If You Want Spaghetti and Fettuccine
Look for both cutters
Spaghetti and fettuccine are produced in the cutting stage, after the dough has been rolled into a pasta sheet. For that reason, a roller by itself does not give you these two finished noodle shapes automatically.
The KSMPRA combines the pasta roller with a spaghetti cutter and a fettuccine cutter, making it a direct match for this two-shape setup.
If You Already Own the KSMPSA
You already have the sheet-making stage
You do not need to replace the KSMPSA simply because you want additional pasta shapes. The KSMPSA already provides the rolling stage needed to create the pasta sheet.
Expand only when necessary
If you want a particular noodle shape, look for the compatible cutter or cutter configuration that provides it. This can be more practical than buying another roller when your existing KSMPSA is still working correctly.
If You Want a Complete Pasta Setup
If you want several traditional pasta shapes without having to assemble a collection of separate attachments, the KSMPDX 5-Piece Pasta Deluxe Set is the broadest of the three configurations compared below.
KitchenAid lists the KSMPDX as including the pasta roller, spaghetti cutter, fettuccine cutter, lasagnette cutter, and capellini cutter.
KSMPSA vs. KSMPRA vs. KSMPDX
| KSMPSA | KSMPRA | KSMPDX |
|---|---|---|
|
Pasta roller Yes |
Pasta roller Yes |
Pasta roller Yes |
|
Spaghetti cutter No |
Spaghetti cutter Yes |
Spaghetti cutter Yes |
|
Fettuccine cutter No |
Fettuccine cutter Yes |
Fettuccine cutter Yes |
|
Lasagnette cutter No |
Lasagnette cutter No |
Lasagnette cutter Yes |
|
Capellini cutter No |
Capellini cutter No |
Capellini cutter Yes |
|
Best suited to Pasta sheets and hand-cut pasta |
Best suited to Spaghetti and fettuccine |
Best suited to Multiple traditional rolled pasta shapes |
KitchenAid’s accessory documentation identifies the KSMPSA as the roller-only configuration, the KSMPRA with spaghetti and fettuccine cutters, and the KSMPDX with all four cutters plus the roller.
What If You Only Want Fettuccine?
You do not necessarily need the full pasta set.
If fettuccine is the only cut pasta you regularly want to make, look for a configuration that combines the pasta roller with the fettuccine cutter. KitchenAid’s documentation lists the KSMFETPRA as a pasta roller plus fettuccine cutter configuration, while the KSMPRA also includes the spaghetti cutter.
The practical distinction is simple: choose the configuration according to whether you want only fettuccine or want fettuccine plus additional cutter options.
What If You Want Capellini or Lasagnette?
Very thin pasta
KitchenAid identifies the capellini cutter for very thin, delicate angel-hair-type pasta and capellini.
Wide ribbon pasta
The lasagnette cutter produces a wider ribbon-style cut from a prepared pasta sheet.
The KSMPCA is KitchenAid’s 2-piece cutter set containing the capellini and lasagnette cutters. The KSMPDX includes both of those cutters together with the pasta roller, spaghetti cutter, and fettuccine cutter.
Buying the Right Configuration
Start with the finished pasta
Decide whether you want sheets, spaghetti, fettuccine, capellini, lasagnette, or several of these.
Work backward to the attachments
Remember that the roller makes the sheet and the cutter determines the final noodle cut.
Check what is actually included
Do not assume that two products with similar names contain the same attachments. Check the exact model number and included components.
A Simple Decision Path
Choose a roller-only setup such as the KSMPSA.
Look for a roller configuration that includes both cutters, such as the KSMPRA.
Consider the KSMPDX, which includes the roller and all four cutters.
Buy only the compatible component you are missing instead of duplicating the roller.
One More Compatibility Check
Check the exact model and the exact contents
KitchenAid lists these pasta configurations as fitting household KitchenAid stand mixers, but the important distinction at this stage is not simply whether the attachment connects to your mixer. You also need to verify which components are included with the exact model you are buying.
- Confirm your KitchenAid mixer model if you have any compatibility uncertainty.
- Confirm the exact pasta attachment model number.
- Check whether the package includes a roller, cutter, or both.
- Match the included cutter to the pasta shape you actually want.
- If you already own a KSMPSA, check whether you only need an additional cutter.
The simplest way to choose a KitchenAid pasta setup is to start with the pasta you want on your plate. KSMPSA is the roller-only option, KSMPRA adds spaghetti and fettuccine cutters, and KSMPDX expands the setup to include spaghetti, fettuccine, lasagnette, and capellini. If you already own the roller, you may only need to add the specific cutter that is missing.
Where to Buy a KitchenAid Pasta Roller and Which One to Choose
If you have decided that a KitchenAid pasta attachment is right for your mixer, the next question is which set actually makes sense for the way you plan to make pasta.
KitchenAid offers several pasta attachment configurations, from the KSMPSA pasta roller to the KSMPRA roller and cutter set and the larger KSMPDX Pasta Deluxe Set. The main difference is not whether they can roll pasta dough, but how many cutting options you get after the dough has been rolled.
The right choice therefore depends more on what you want to make than simply choosing the largest set.
KitchenAid Pasta Attachments at a Glance
KSMPSA
A roller-focused setup for turning pasta dough into smooth, even sheets.
- Pasta roller
- 6-inch pasta sheets
- 8 thickness settings
- Best for sheet-based pasta
KSMPRA
Adds spaghetti and fettuccine cutters to the pasta roller.
- Pasta roller
- Spaghetti cutter
- Fettuccine cutter
- Good everyday setup
KSMPDX
Expands the setup with additional cutters for greater pasta variety.
- Pasta roller
- Spaghetti cutter
- Fettuccine cutter
- Lasagnette + capellini cutters
Buy the KSMPSA If You Only Need the Roller
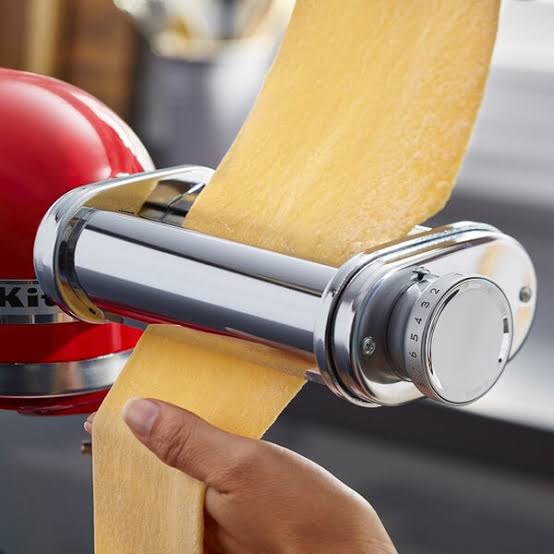
The KSMPSA Pasta Roller is the straightforward option if your main goal is turning pasta dough into evenly rolled sheets.
It has eight thickness settings and rolls pasta into approximately 6-inch-wide sheets, making it useful for lasagna sheets, ravioli and other sheet-based pasta.
KitchenAid KSMPSA Pasta Roller
Product Specifications
Pros
- Simple roller-focused setup
- Eight thickness settings
- Useful for pasta sheets
- Can be expanded with compatible cutters
- Good if you do not need multiple cutters
Cons
- No spaghetti cutter included
- No fettuccine cutter included
- Additional cutters cost extra
As an Amazon Associate, MixerDecoded may earn from qualifying purchases.
Buy the KSMPRA If You Want Spaghetti and Fettuccine
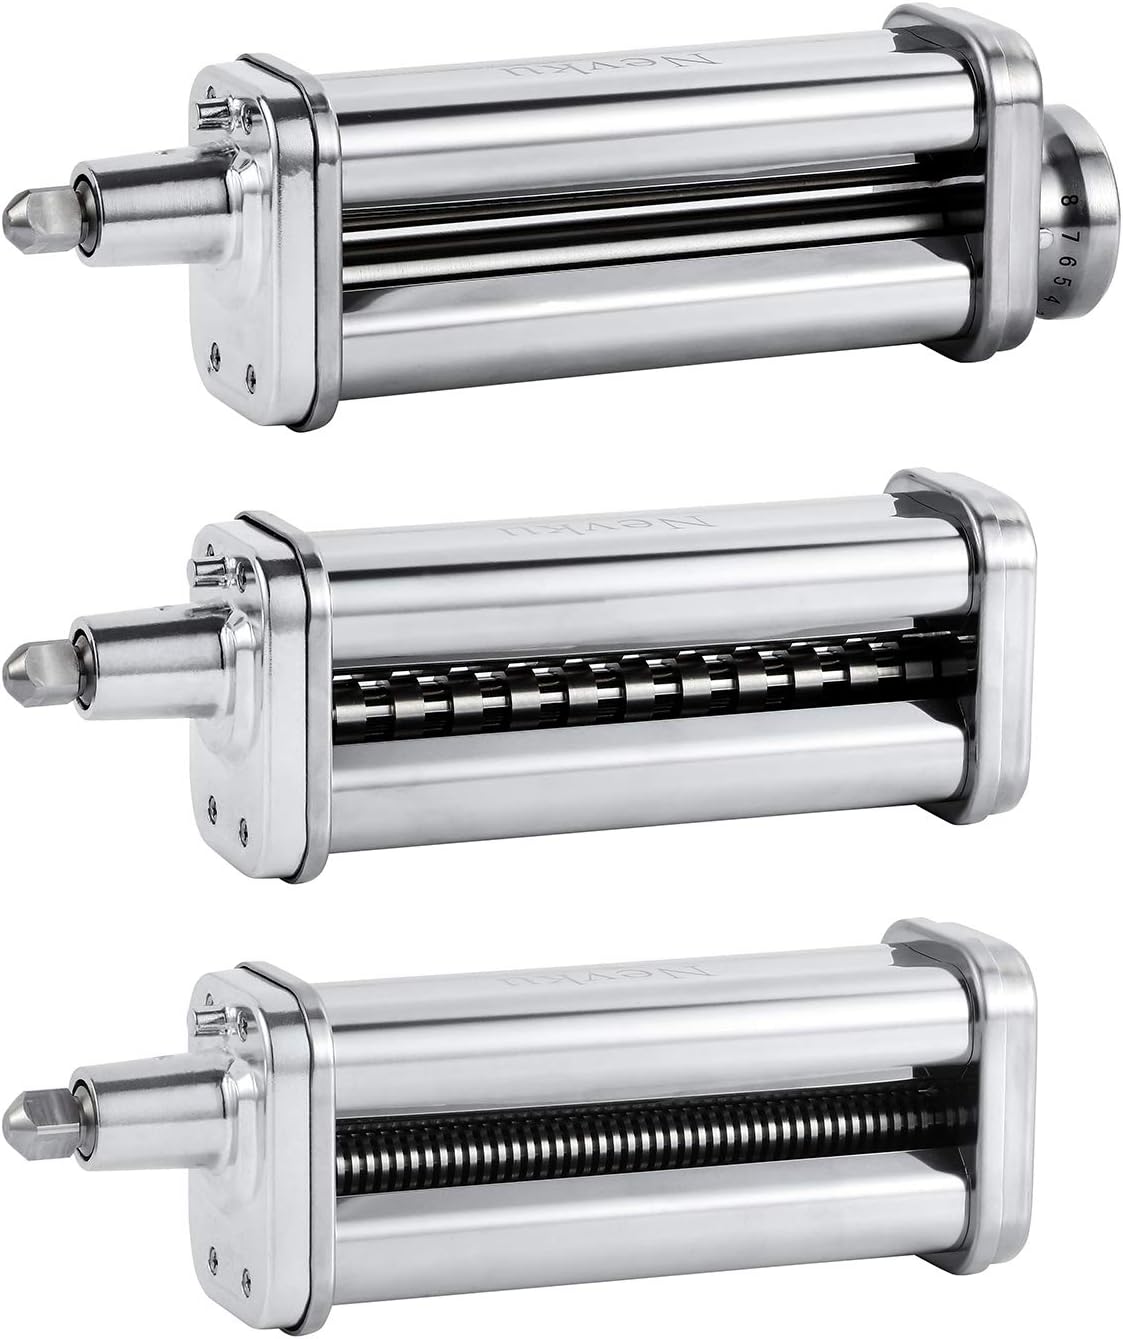
The KSMPRA 3-Piece Pasta Roller & Cutter Set takes the basic roller setup a step further by including two cutters.
Along with the pasta roller, the set includes a spaghetti cutter and fettuccine cutter. This lets you roll the dough into sheets and then turn those sheets into two familiar pasta styles without buying those cutters separately.
KitchenAid KSMPRA 3-Piece Pasta Roller & Cutter Set
Product Specifications
Pros
- Roller and cutters in one set
- Includes spaghetti cutter
- Includes fettuccine cutter
- Eight roller thickness settings
- Convenient everyday setup
Cons
- Costs more than the roller alone
- Fewer cutter options than KSMPDX
- May be unnecessary for sheet-only users
As an Amazon Associate, MixerDecoded may earn from qualifying purchases.
Consider the KSMPDX If You Want More Cutter Options
The KSMPDX 5-Piece Pasta Deluxe Set is designed for people who want more than the basic roller, spaghetti and fettuccine combination.
In addition to the pasta roller, spaghetti cutter and fettuccine cutter, the set adds lasagnette and capellini cutters. That gives you more ways to turn rolled pasta sheets into different noodle styles.
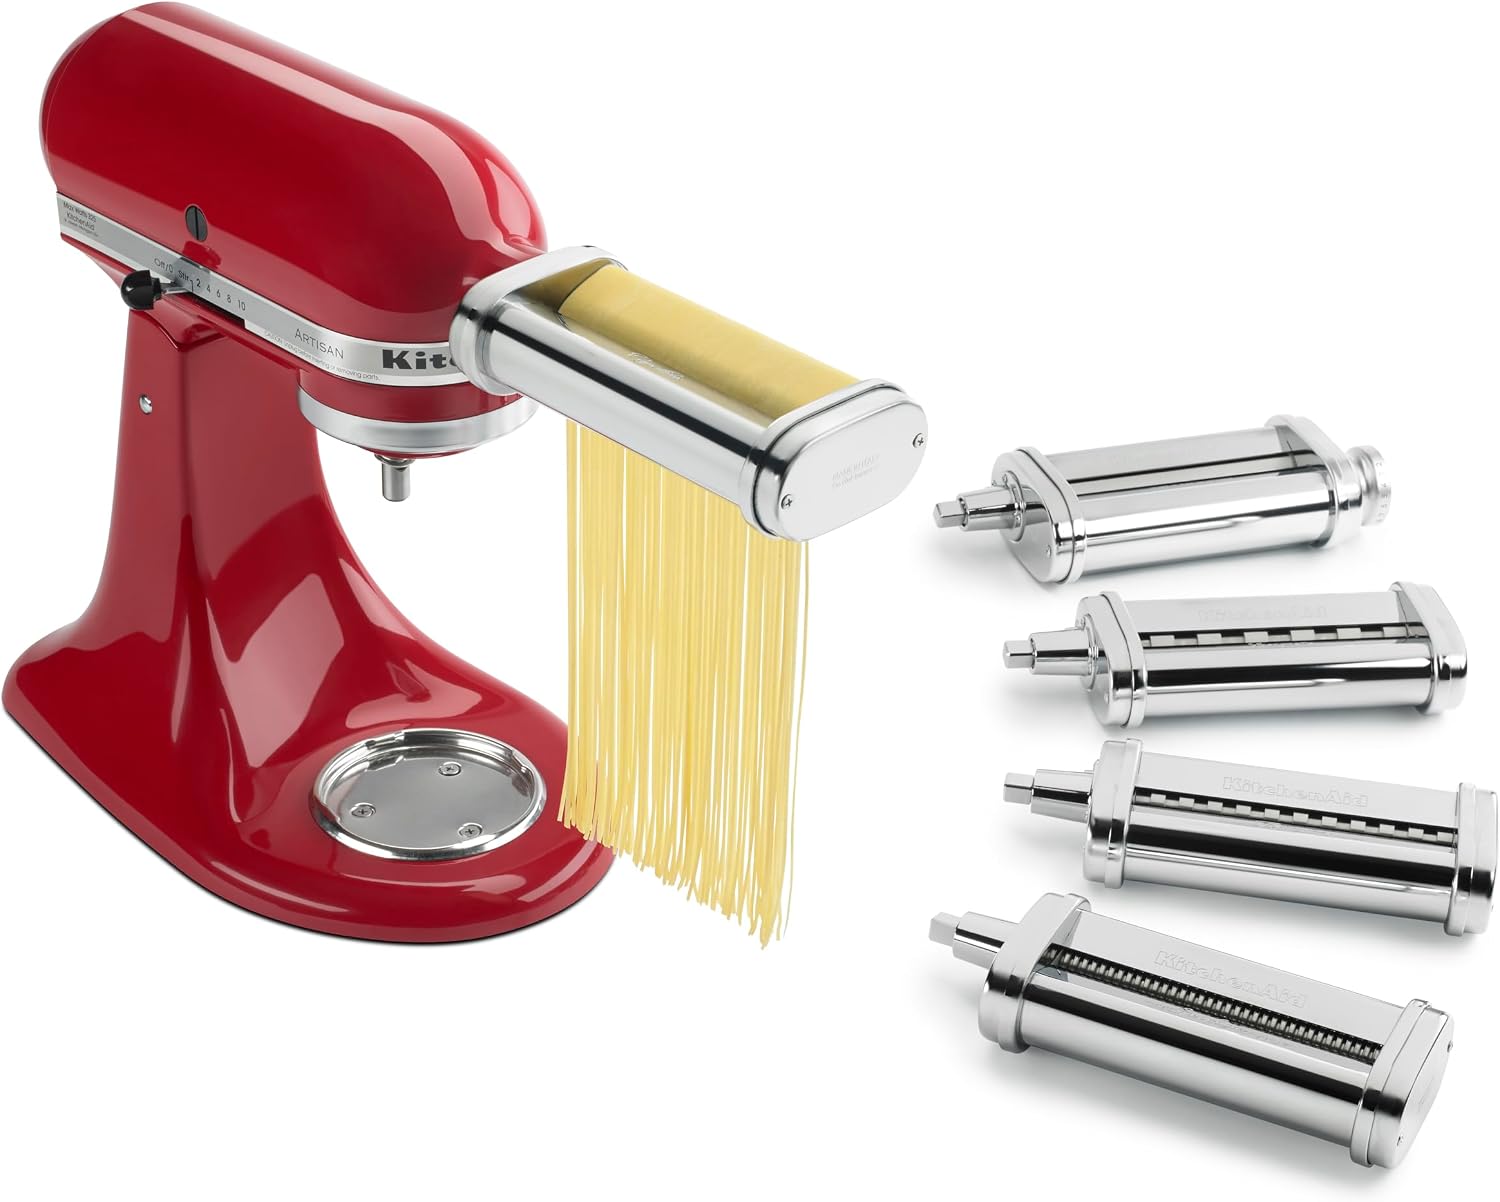
KitchenAid KSMPDX 5-Piece Pasta Deluxe Set
Product Specifications
Pros
- Includes five pasta-making pieces
- More cutter options
- Includes capellini cutter
- Includes lasagnette cutter
- Useful for different pasta styles
Cons
- More expensive than smaller sets
- More attachments to store
- Some cutters may go unused
- May be unnecessary for occasional users
As an Amazon Associate, MixerDecoded may earn from qualifying purchases.
If You Already Own a KSMPSA
If you already have the KSMPSA, there is no need to replace it simply because you want to make more types of pasta. The roller already handles the pasta-sheet stage.
The question is what functionality you are missing. If you need additional pasta shapes, you can look at compatible cutters or compare the cost of expanding your current setup with buying a complete set.
Only Make Pasta Sheets?
Keep your KSMPSA. It already handles the rolling stage you need.
Want Spaghetti & Fettuccine?
Consider adding compatible cutters or comparing the cost of expanding your existing setup.
Want More Pasta Varieties?
Look at the additional cutter options available in the larger KSMPDX setup.
Which KitchenAid Pasta Attachment Fits Your Setup?
Instead of choosing based only on the number of pieces in the box, start with the pasta you actually expect to make.
| Your Situation | Attachment to Look At |
|---|---|
| Mainly want pasta sheets | KSMPSA |
| Want sheets, spaghetti and fettuccine | KSMPRA |
| Want additional cutter options | KSMPDX |
| Already own a KSMPSA | Keep it and expand if needed |
Frequently Asked Questions
Does the KitchenAid KSMPSA pasta roller fit all KitchenAid stand mixers?
KitchenAid currently states that the KSMPSA pasta roller fits all household KitchenAid stand mixers. It connects through the mixer’s front attachment hub rather than the bowl or beater shaft. If you have an older or vintage KitchenAid mixer and want to verify a particular attachment or replacement part, checking the exact mixer model number is still useful.
What is the difference between KSMPSA and KSMPRA?
The KSMPSA is the standalone pasta roller, while the KSMPRA is a roller-and-cutter set. The current KSMPRA package includes the pasta roller, spaghetti cutter, fettuccine cutter and cleaning brush. Both configurations are designed to connect to the KitchenAid stand mixer’s attachment hub. If you only need pasta sheets, the roller configuration is sufficient; if you want to make spaghetti and fettuccine with the included cutters, the KSMPRA provides those additional components.
Can I make spaghetti with the KSMPSA?
The KSMPSA can roll the pasta sheet needed to make spaghetti, but the roller itself does not cut the sheet into spaghetti strands. You need a compatible spaghetti cutter after rolling the dough. The basic process is pasta dough → KSMPSA roller → flat sheet → spaghetti cutter. This is why it is important to distinguish the pasta roller from the individual pasta cutters when checking what is included in a product package.
What thickness setting should I use on a KitchenAid pasta roller?
KitchenAid pasta rollers have eight thickness settings, with setting 1 producing the thickest sheet and setting 8 producing the thinnest. KitchenAid’s published chart associates different pasta types with different ranges: settings 4–5 are used for preparations such as lasagna, fettuccine, spaghetti and ravioli, while settings 6–8 are used for progressively thinner pasta. The exact stopping point depends on the pasta you are making and the recipe being followed.
What speed should a KitchenAid pasta roller use?
KitchenAid’s current 3-in-1 pasta-attachment guidance specifies Speed 4 for rolling and cutting. The mixer speed should not be confused with the roller’s numbered thickness settings. The mixer speed controls how quickly the attachment rotates, while the roller setting controls the thickness of the pasta sheet. Some older KitchenAid documentation gives different instructions for particular pasta-roller procedures, so the instructions supplied for your specific attachment should take precedence.
Why isn’t my KitchenAid pasta roller turning?
First, turn the mixer off and check that the attachment is fully seated in the front hub. The attachment’s power shaft needs to engage the square socket, the locating pin needs to sit correctly in the hub notch, and the hub knob needs to be tightened. Also check that the mixer is operating normally and that you are using the appropriate speed. If the mixer stops unexpectedly, KitchenAid recommends turning it off briefly and restarting it; if it still does not start, its troubleshooting guidance recommends allowing the mixer to cool before trying again.
Final Thoughts
Choose the Pasta Attachment Based on What You Actually Need
The KitchenAid KSMPSA Pasta Roller is designed to fit household KitchenAid stand mixers and connects through the mixer’s front attachment hub. The key is understanding that the KSMPSA is primarily a pasta-sheet roller, not a complete pasta-cutting system by itself.
KSMPSA
Rolls pasta dough into flat sheets. It gives you the foundation needed before cutting the dough into specific pasta shapes.
Spaghetti or Fettuccine Cutter
Takes a prepared pasta sheet and cuts it into spaghetti or fettuccine, depending on the cutter being used.
KSMPRA
Combines the pasta roller with spaghetti and fettuccine cutters, giving you a more complete basic pasta setup.
KSMPDX
Provides the roller plus additional pasta-cutting options for users who want more variety from their setup.
The KSMPSA offers eight thickness settings and produces pasta sheets up to approximately 6 inches wide. KitchenAid’s current guidance specifies Speed 4 for rolling and cutting, while the numbered roller setting determines the sheet thickness.
Already Own a KSMPSA?
You generally do not need to replace the roller simply because you want to make a different pasta shape. If your KSMPSA already handles the sheet-making stage, identify the cutter you need, verify its compatibility, and check exactly what is included before purchasing.
Following this process is more reliable than choosing a KitchenAid pasta attachment based only on its name or appearance. Start with the pasta shape you want to make, determine which component performs that job, and then confirm that the attachment and included pieces match your existing setup.